There was a time that I wanted to get unusual yet convenient tools for my workspace, which then lead me to learn about ergonomic equipment and trackballs.
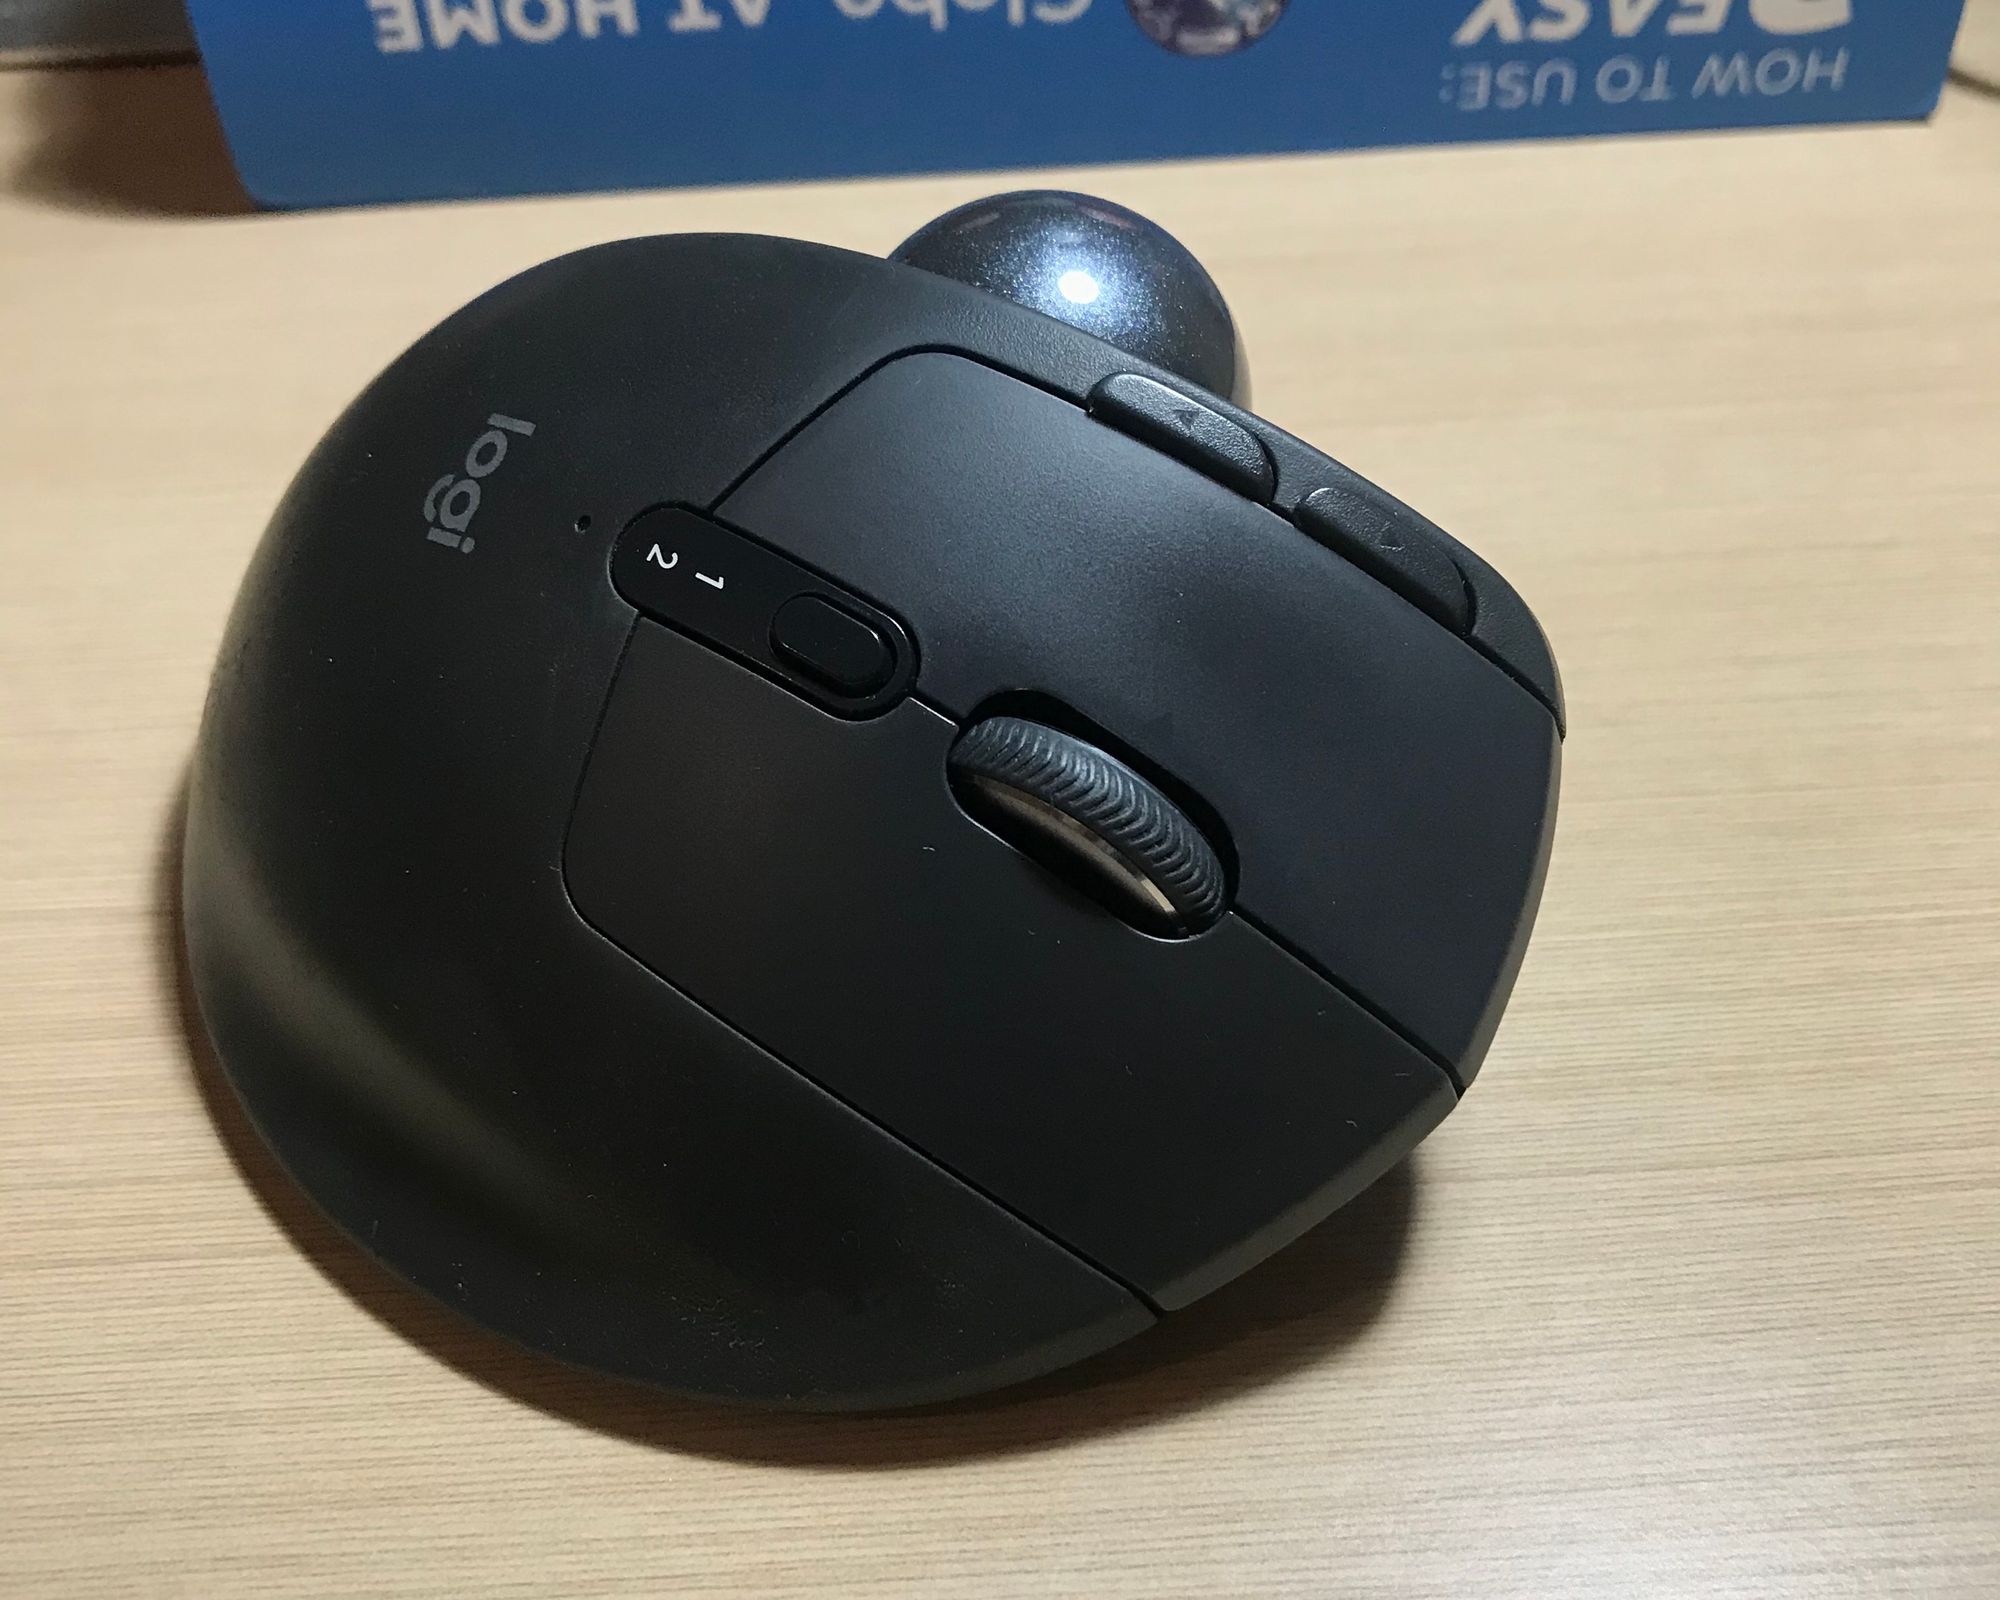
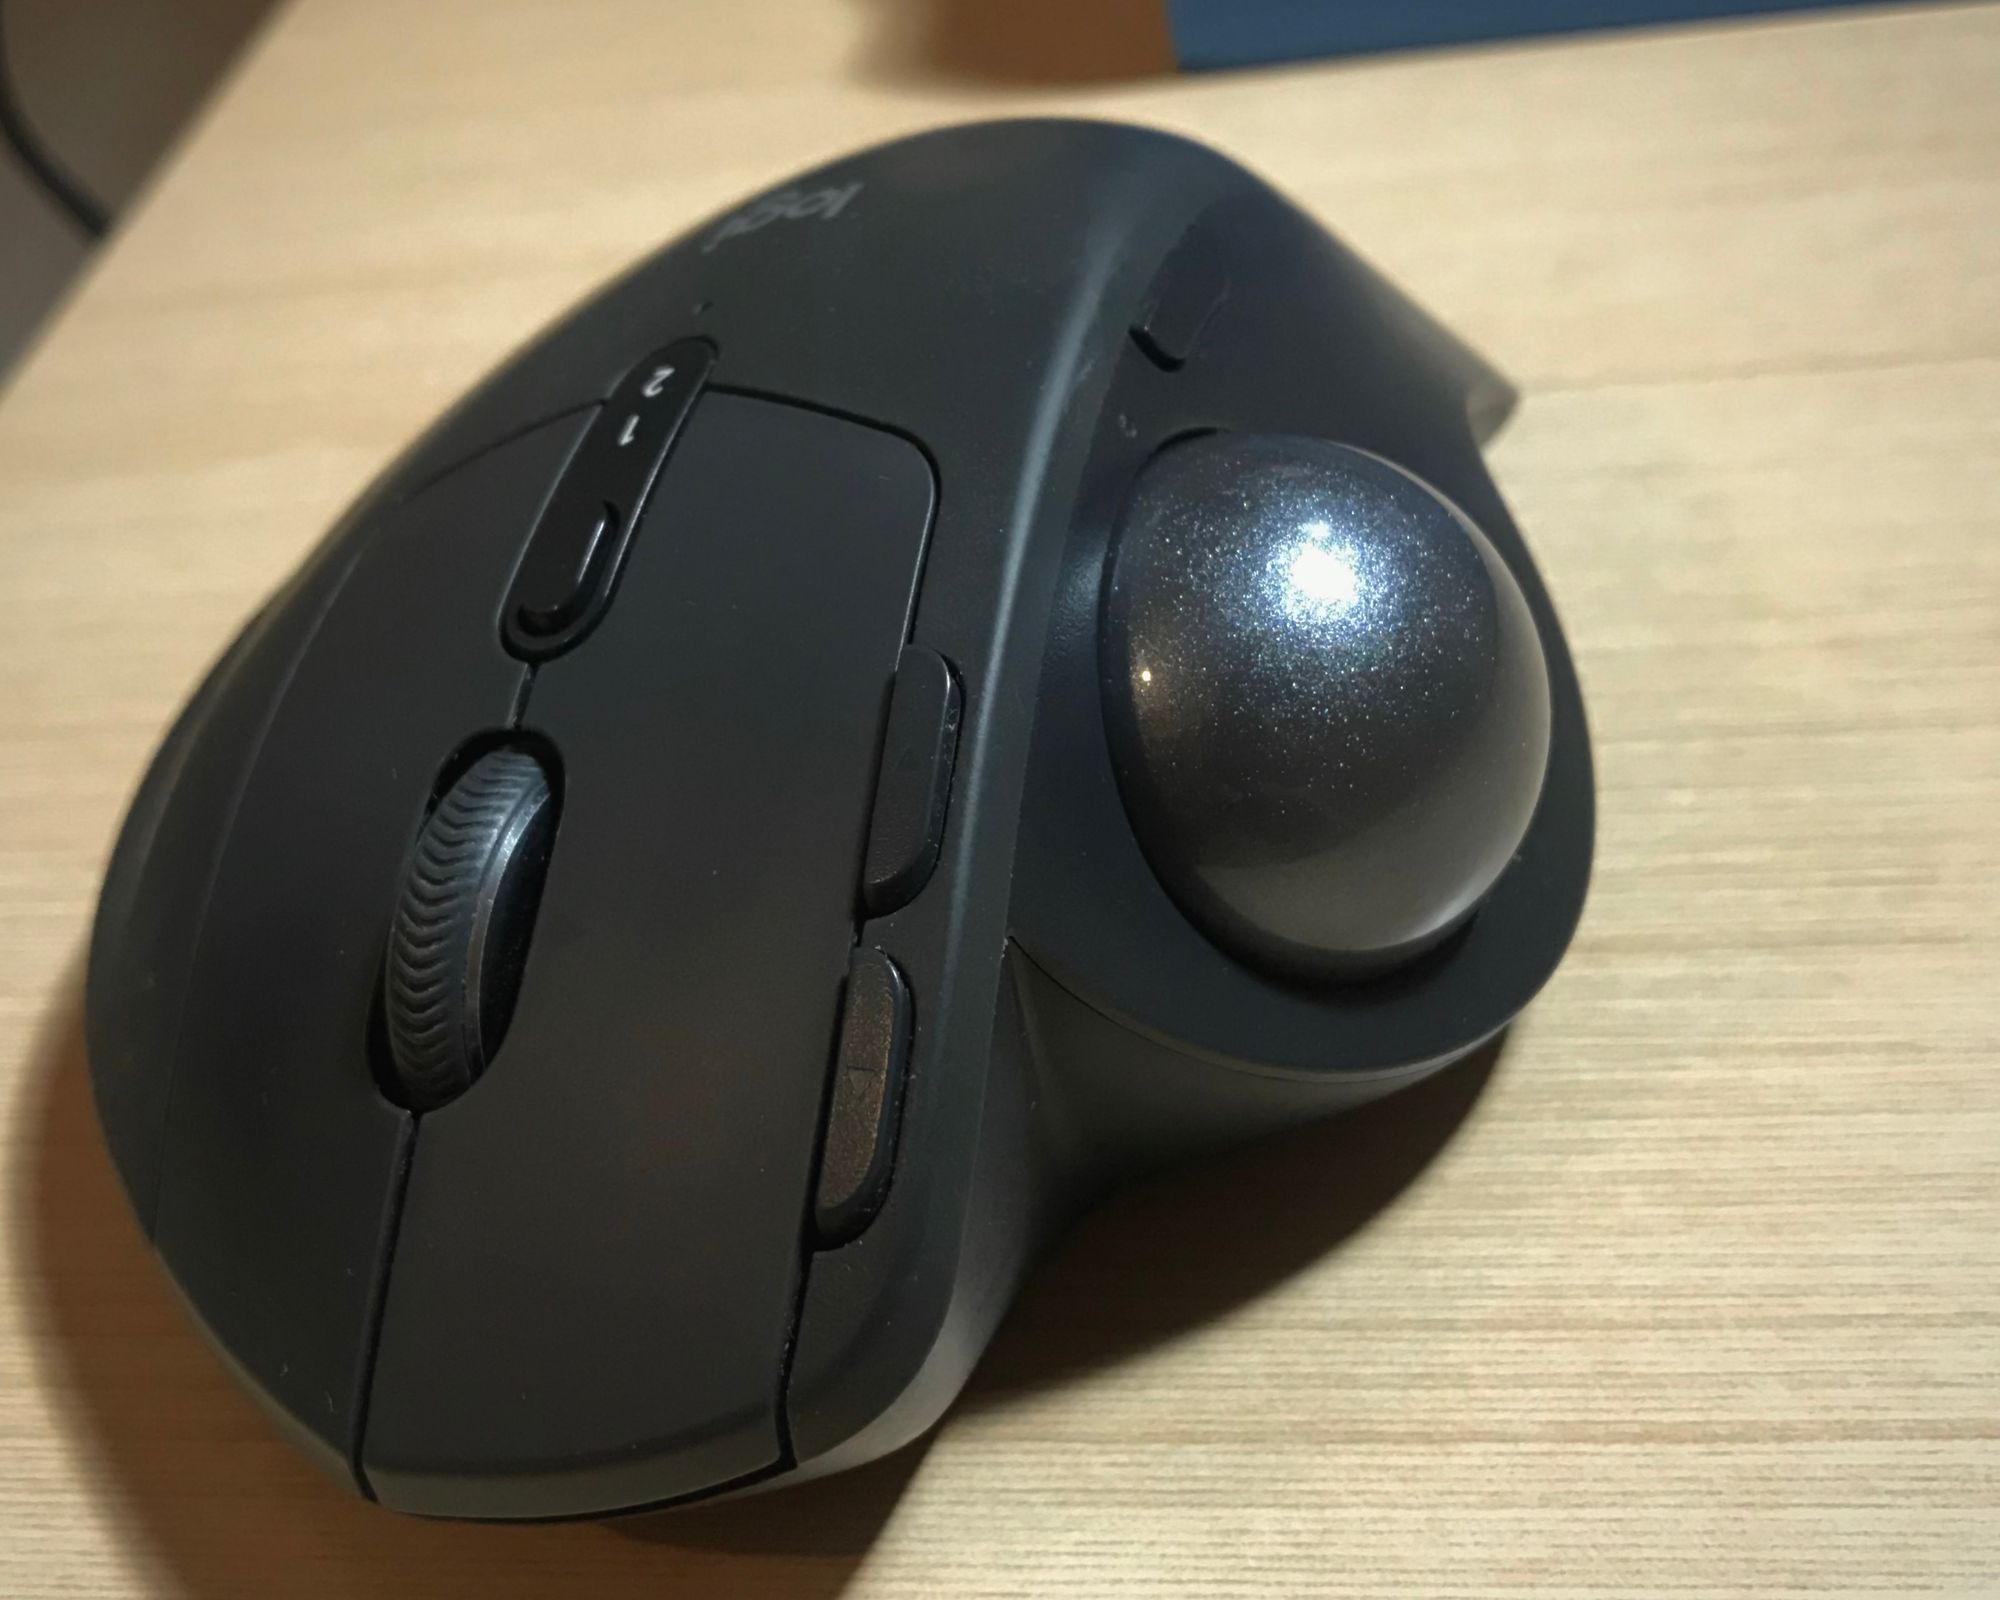
A search for "ergonomic mouse" show me pictures of peculiarly shaped pointing devices, from vertical to trackball mice, and among those is the Logitech MX Ergo, which tickled my fancy.
It is hard to find an MX Ergo in computer stores in my neck of the woods, but luckily I was able to grab one from DataBlitz SM Bacoor for around PHP 4,500. It is my first and current trackball mouse for almost two years now.

Mouse Click Issues
I think the mouse click failure/double-click is a common issue, and most of my previous mice had this problem. I use a computer for 12 hours every day, so it's more likely I get this problem within a year or so of using my mouse.
Usually, I would replace them with a new one, but I wouldn't want to throw away and replace my beloved $90 mouse that I've been using for only a year, so I tried to find a way to repair it instead.
Repairing the mouse
I am not used to opening and repairing electronic devices, but I'm willing to try. After doing a web search, I found this Instructables article on how to open and fix the click mechanism of the mouse that usually causes the problem.
I successfully fixed the left button my Ergo MX months ago, but it occurred again recently for the second time. This time, with the right-click button.
The Instructables article linked above explains the procedures clearly, so I'll show some pictures and a summary of the repair process.
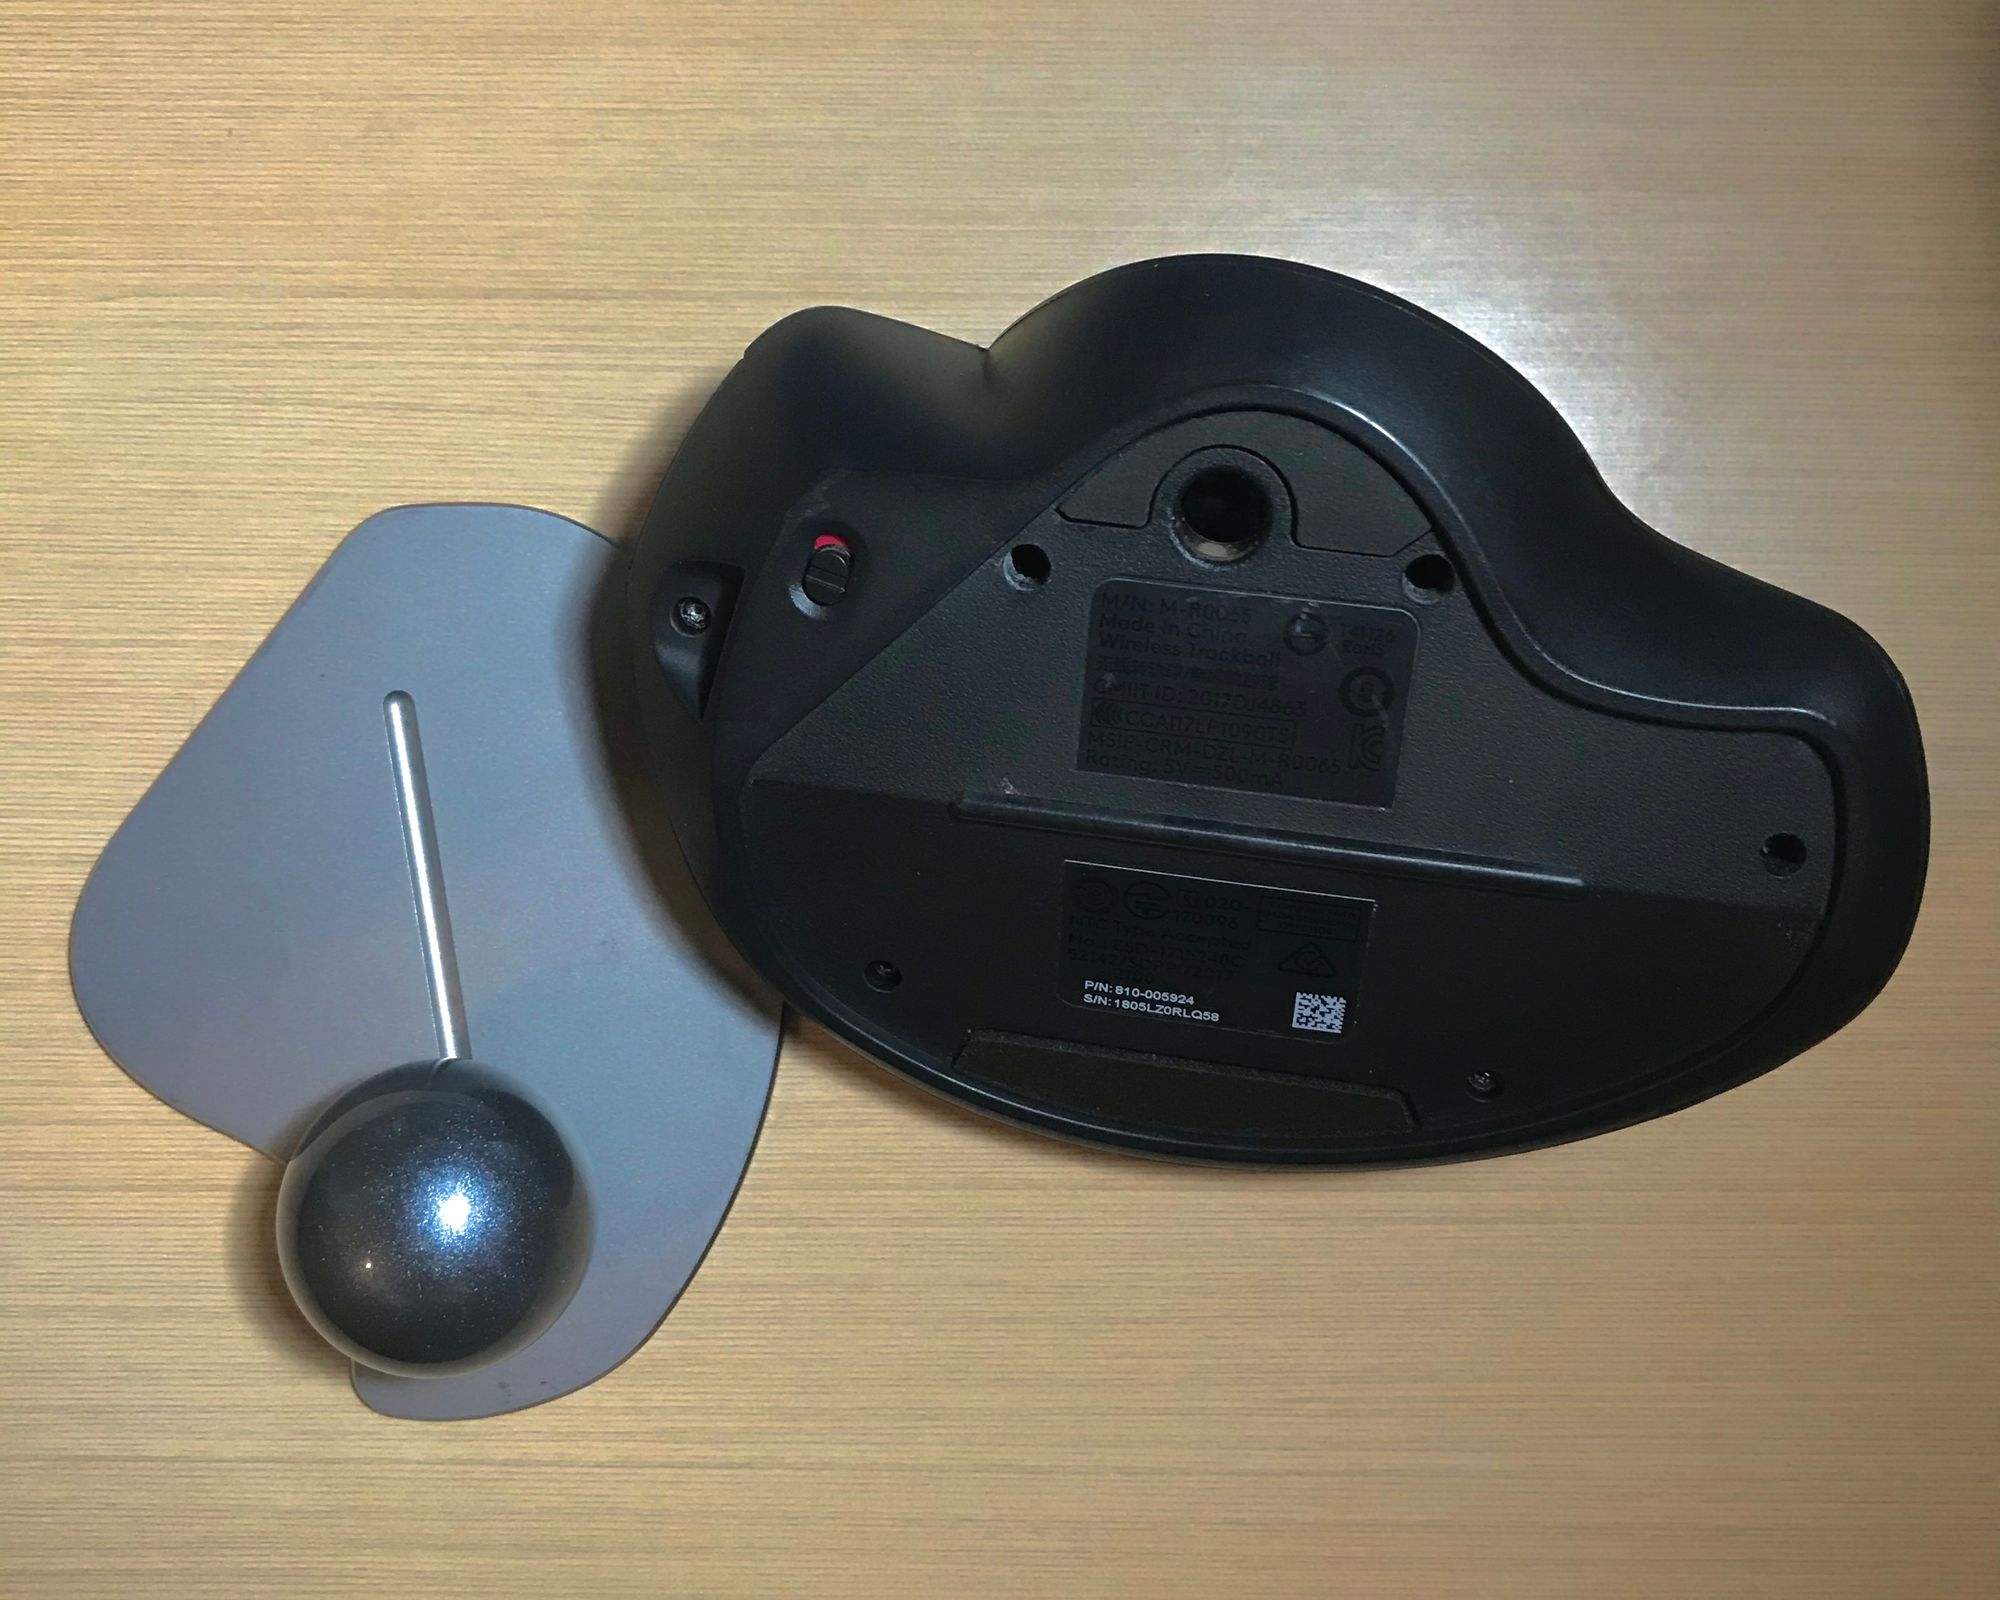
You can remove the ball from the socket by poking it with a thin object from the hole below. The metal hinge attaches to the base of the device through magnetism and is easy to remove.
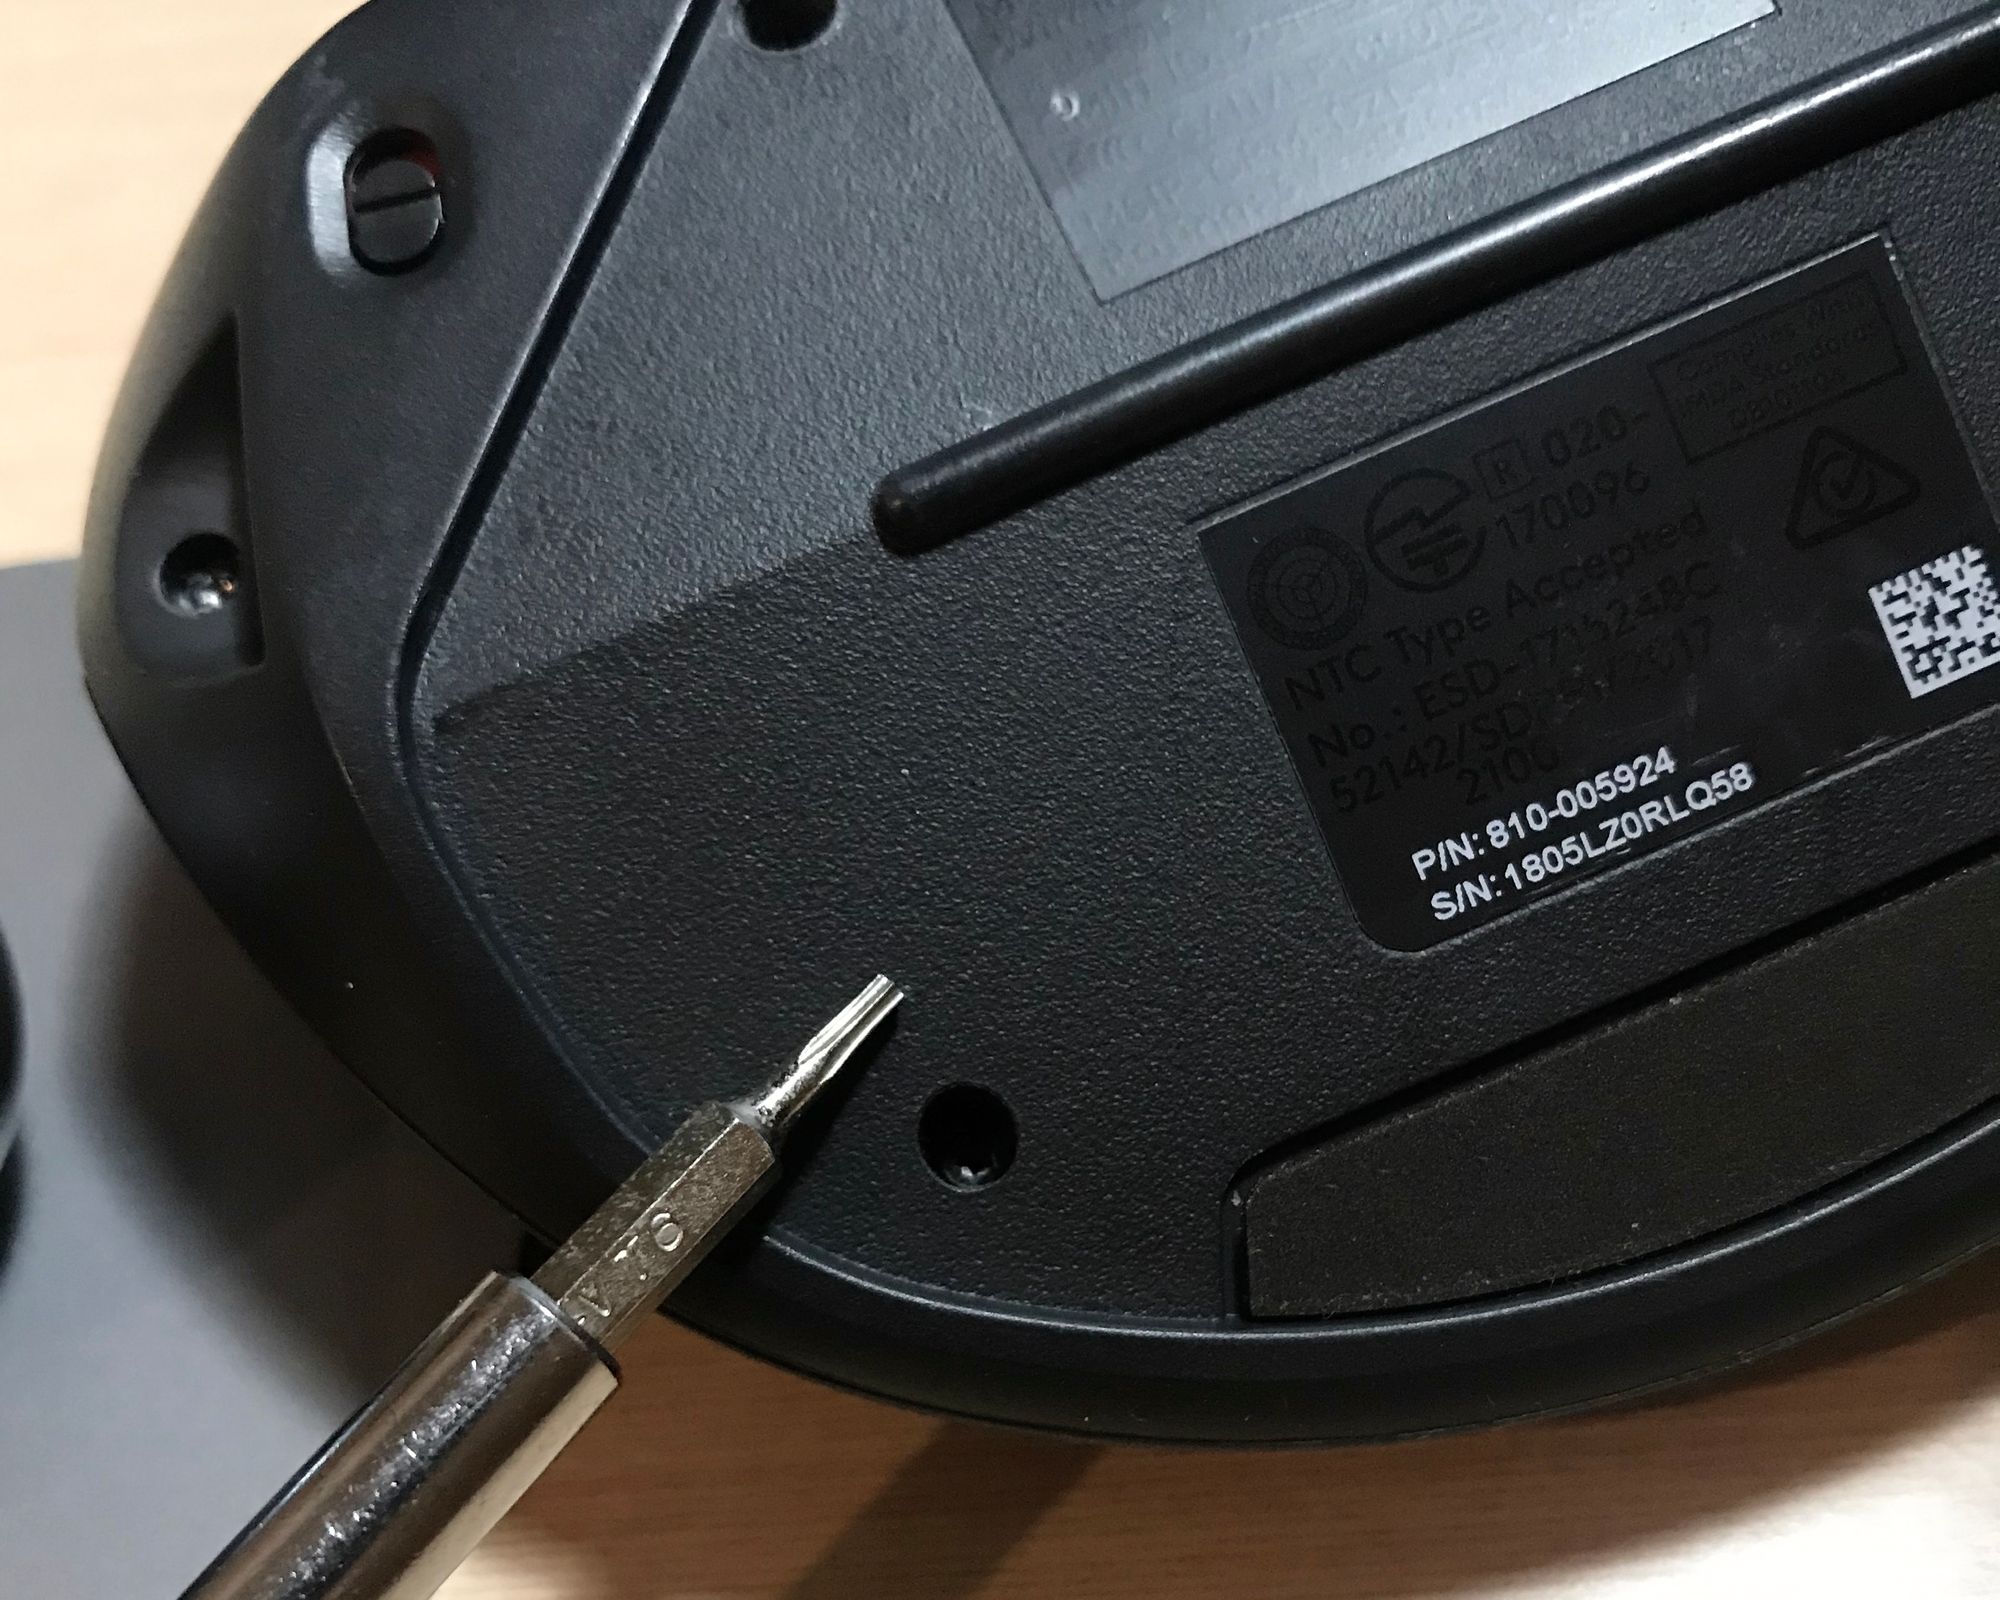
Use a Torx T6 screwdriver to remove the screws located at the bottom of the mouse. If you want to repair electronics, it's handy to have a multi-bit precision screwdriver set.
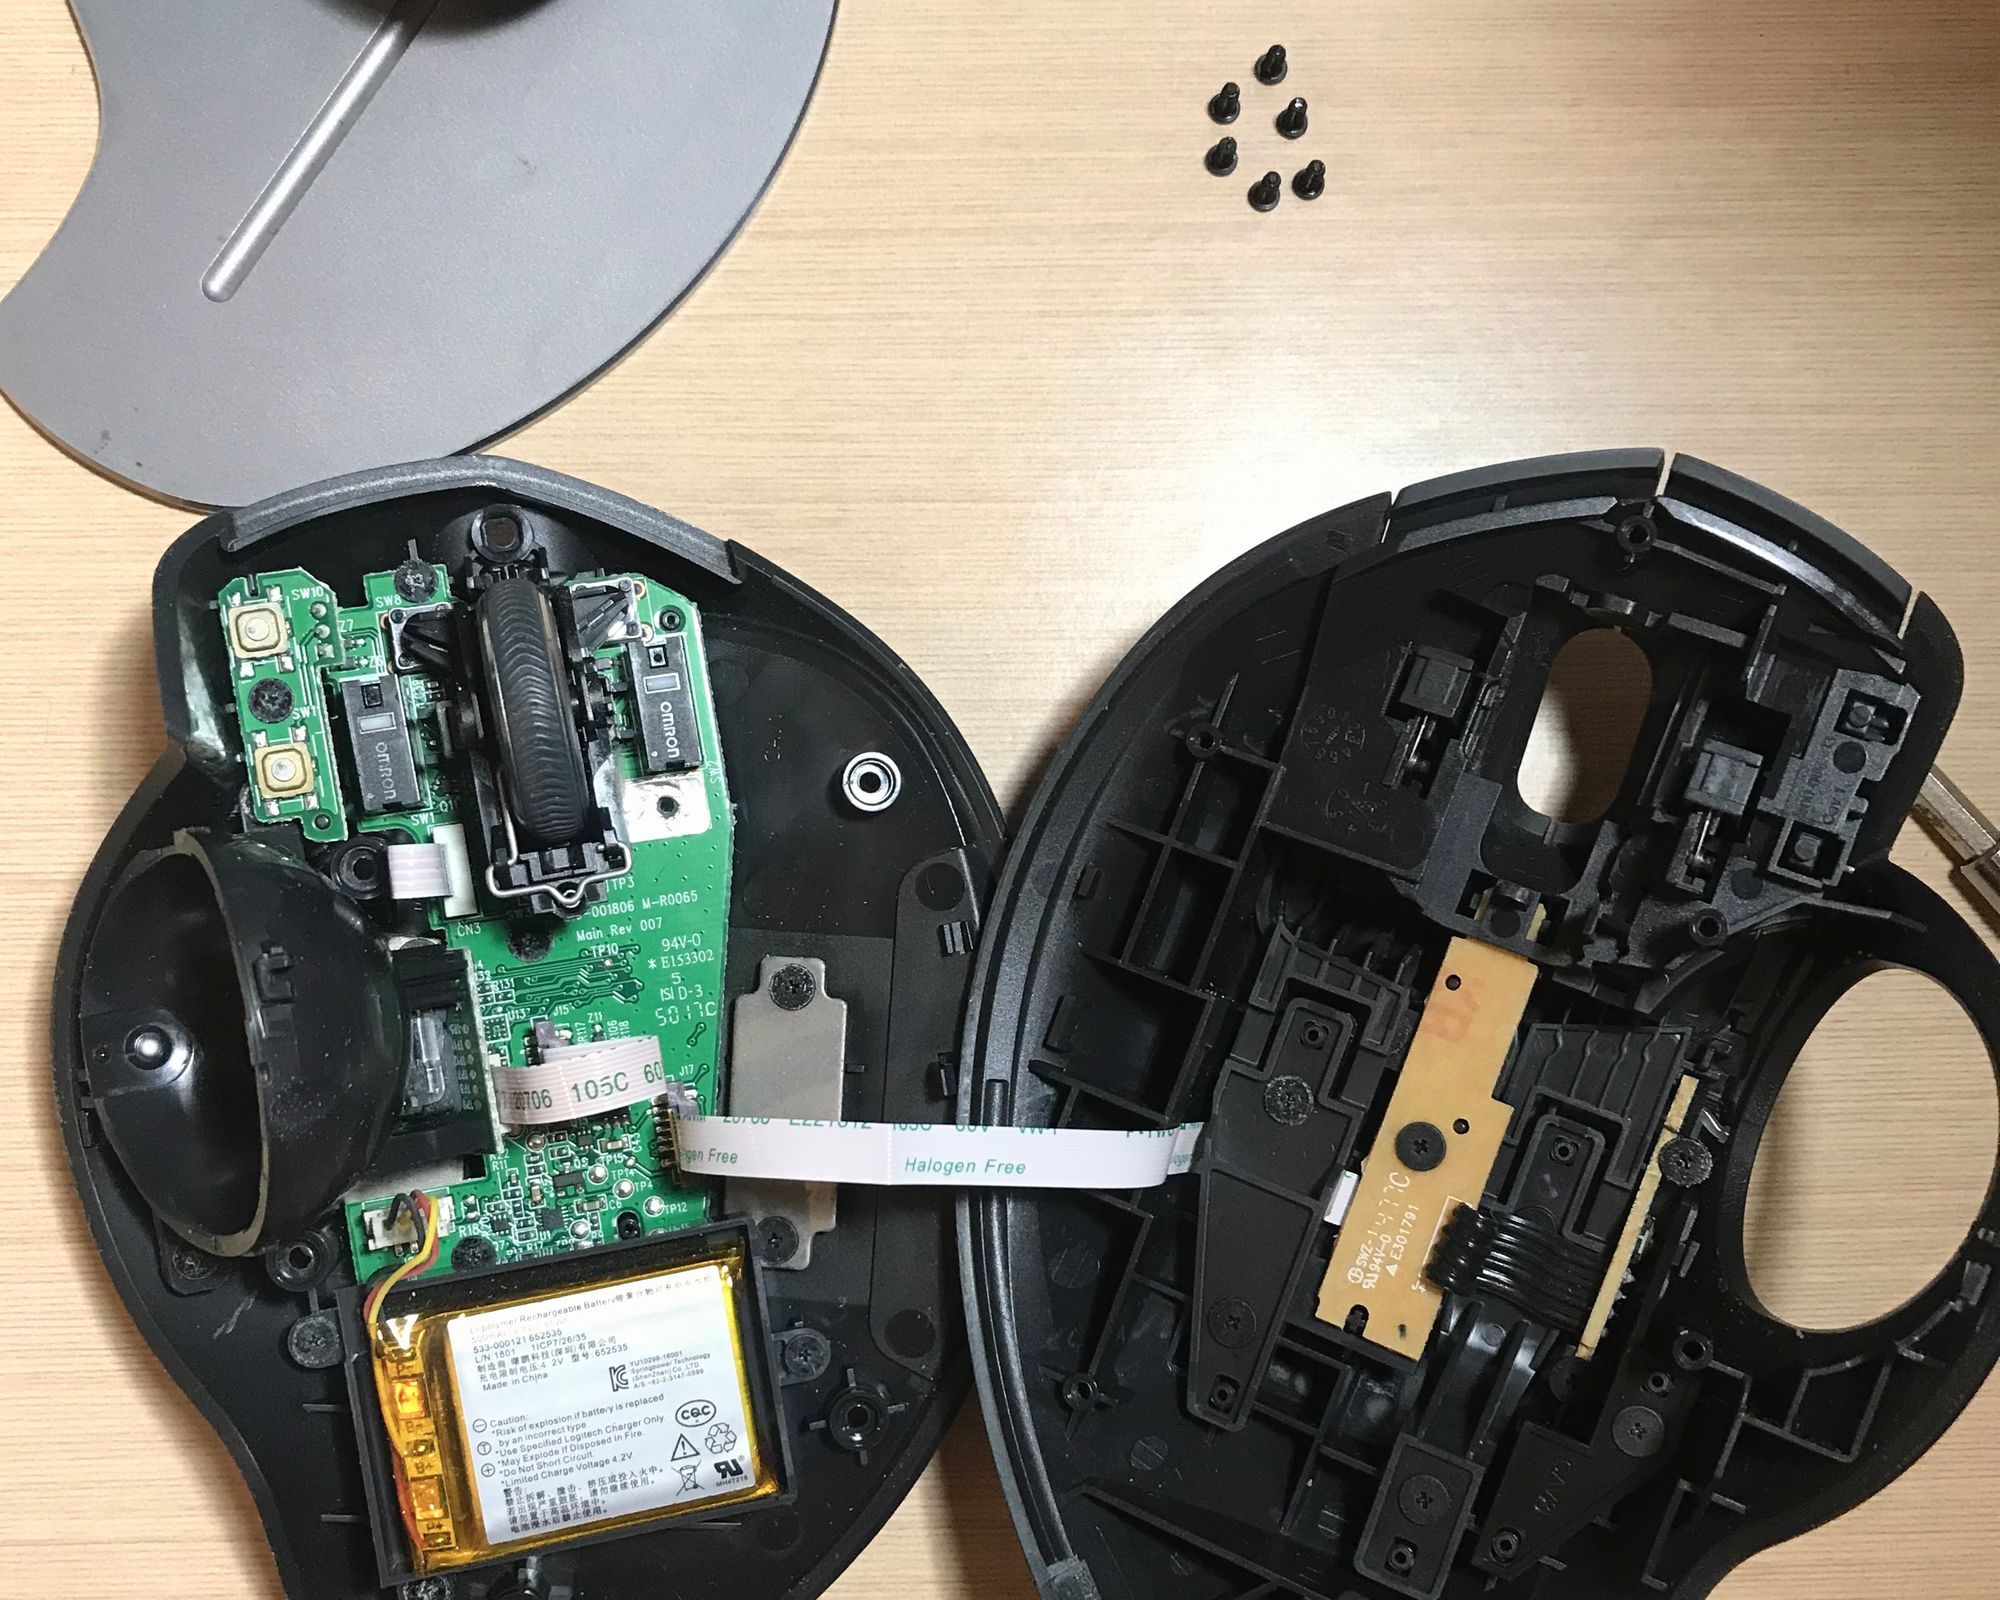
Gently pry open the mouse from the sides. Be careful not to damage the flex cable that attaches to the receiver and precision switch circuit on the upper cover. The screws inside are all Phillips-head (PH-00).
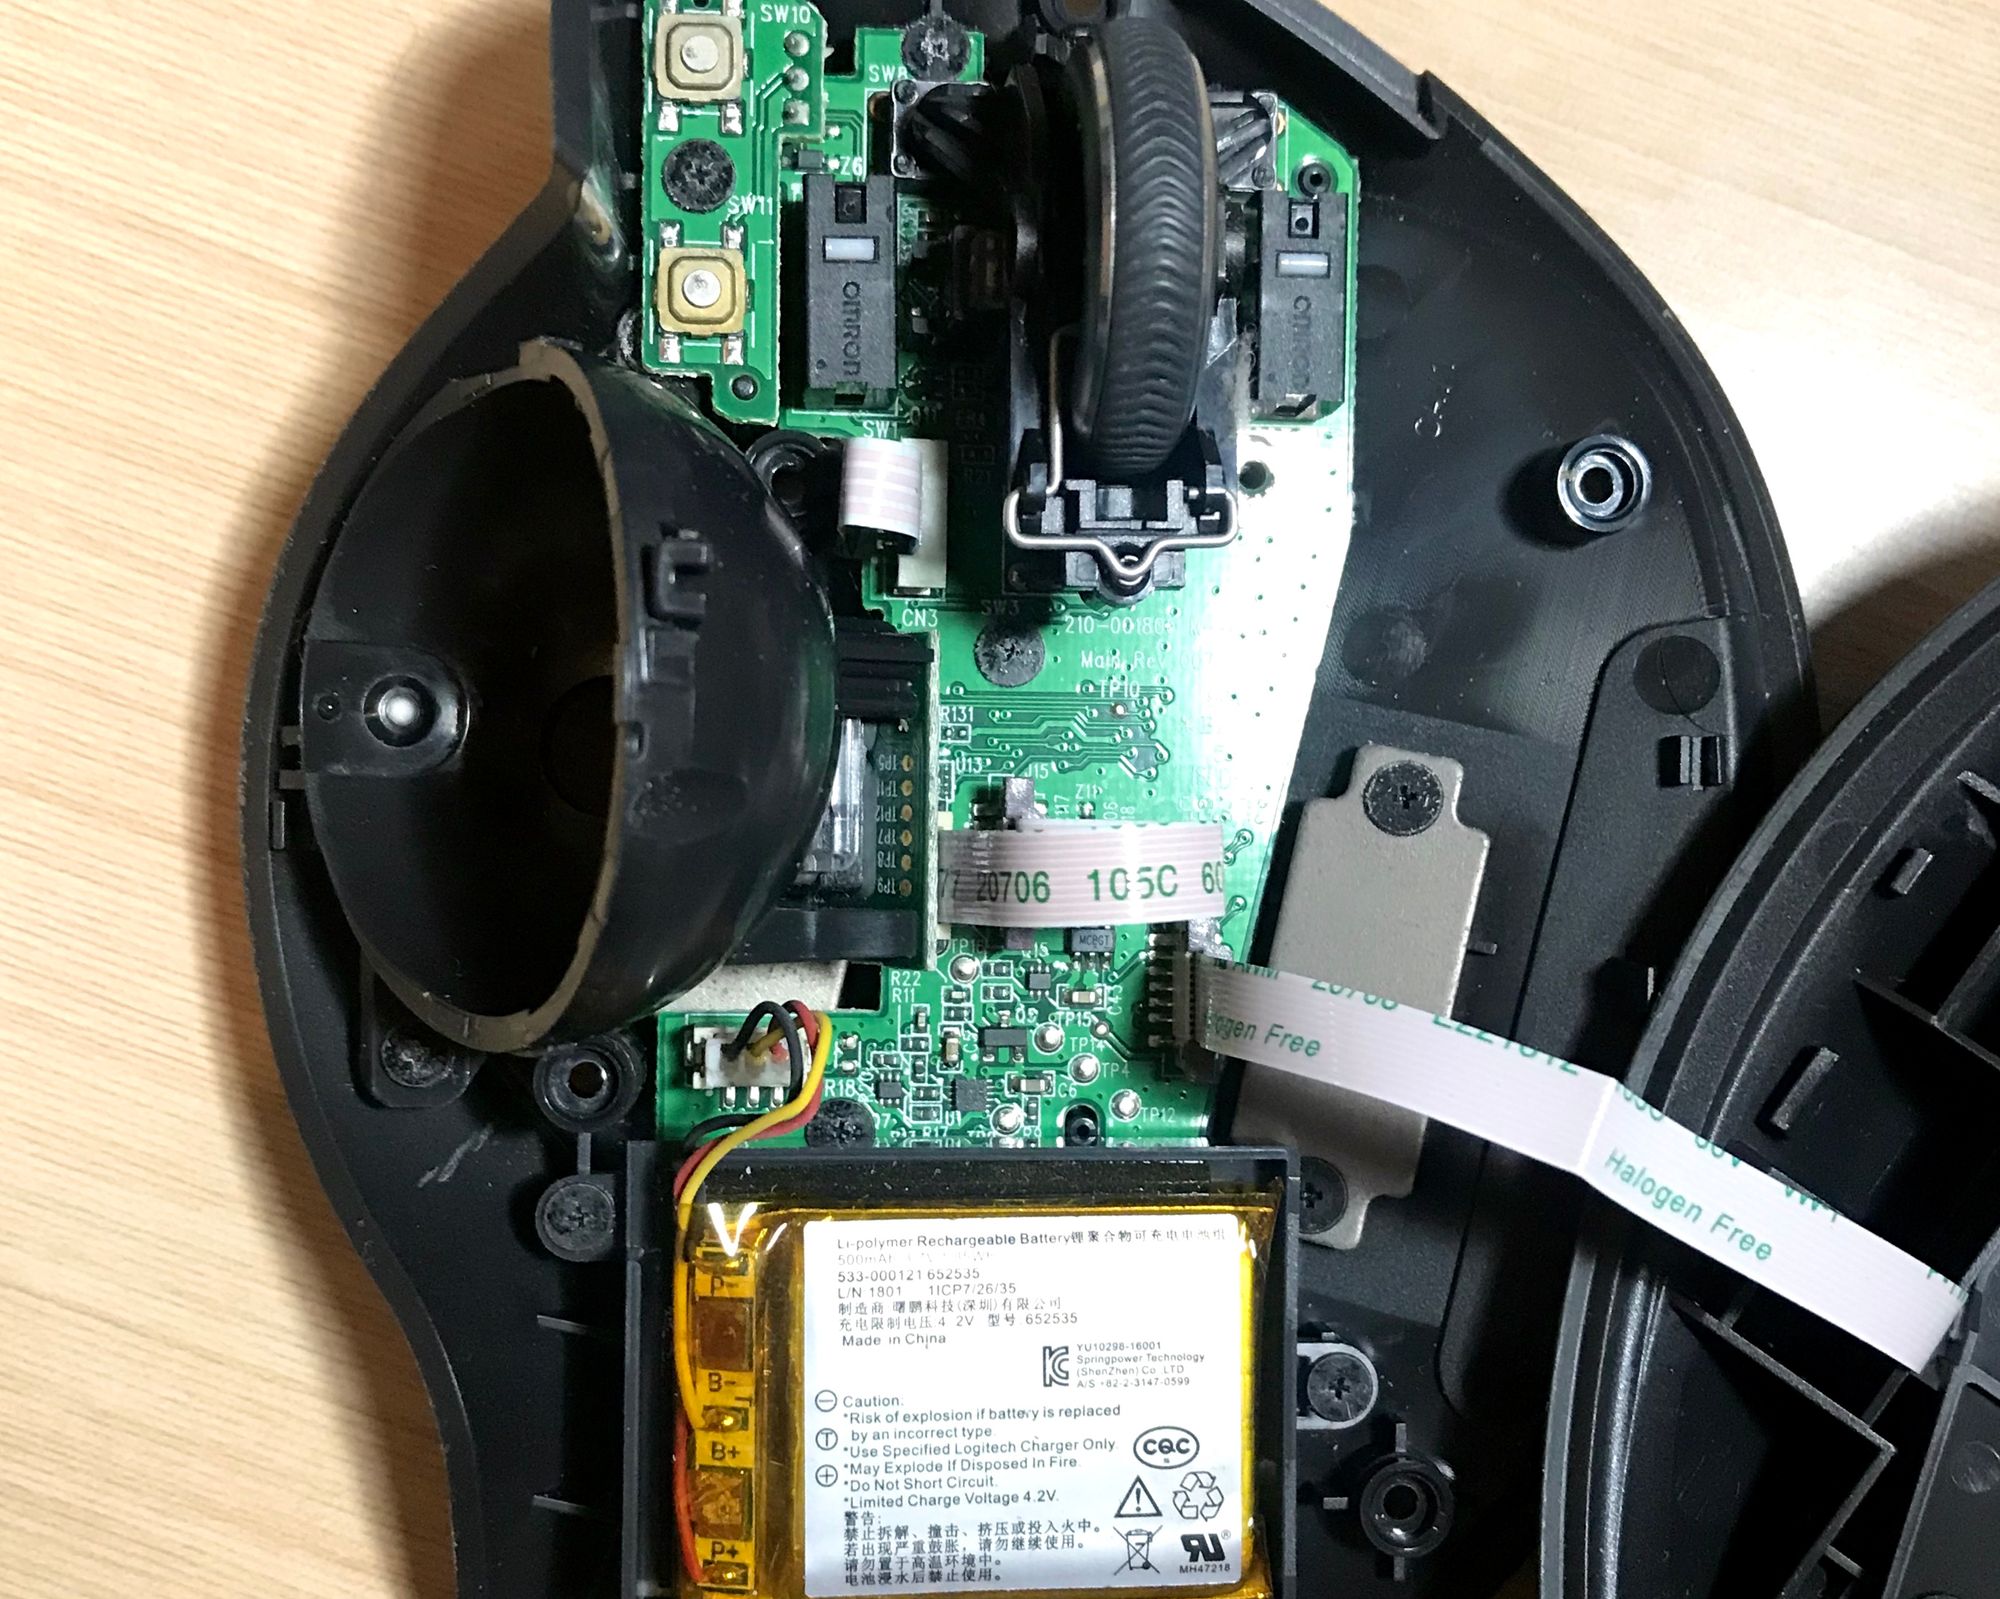
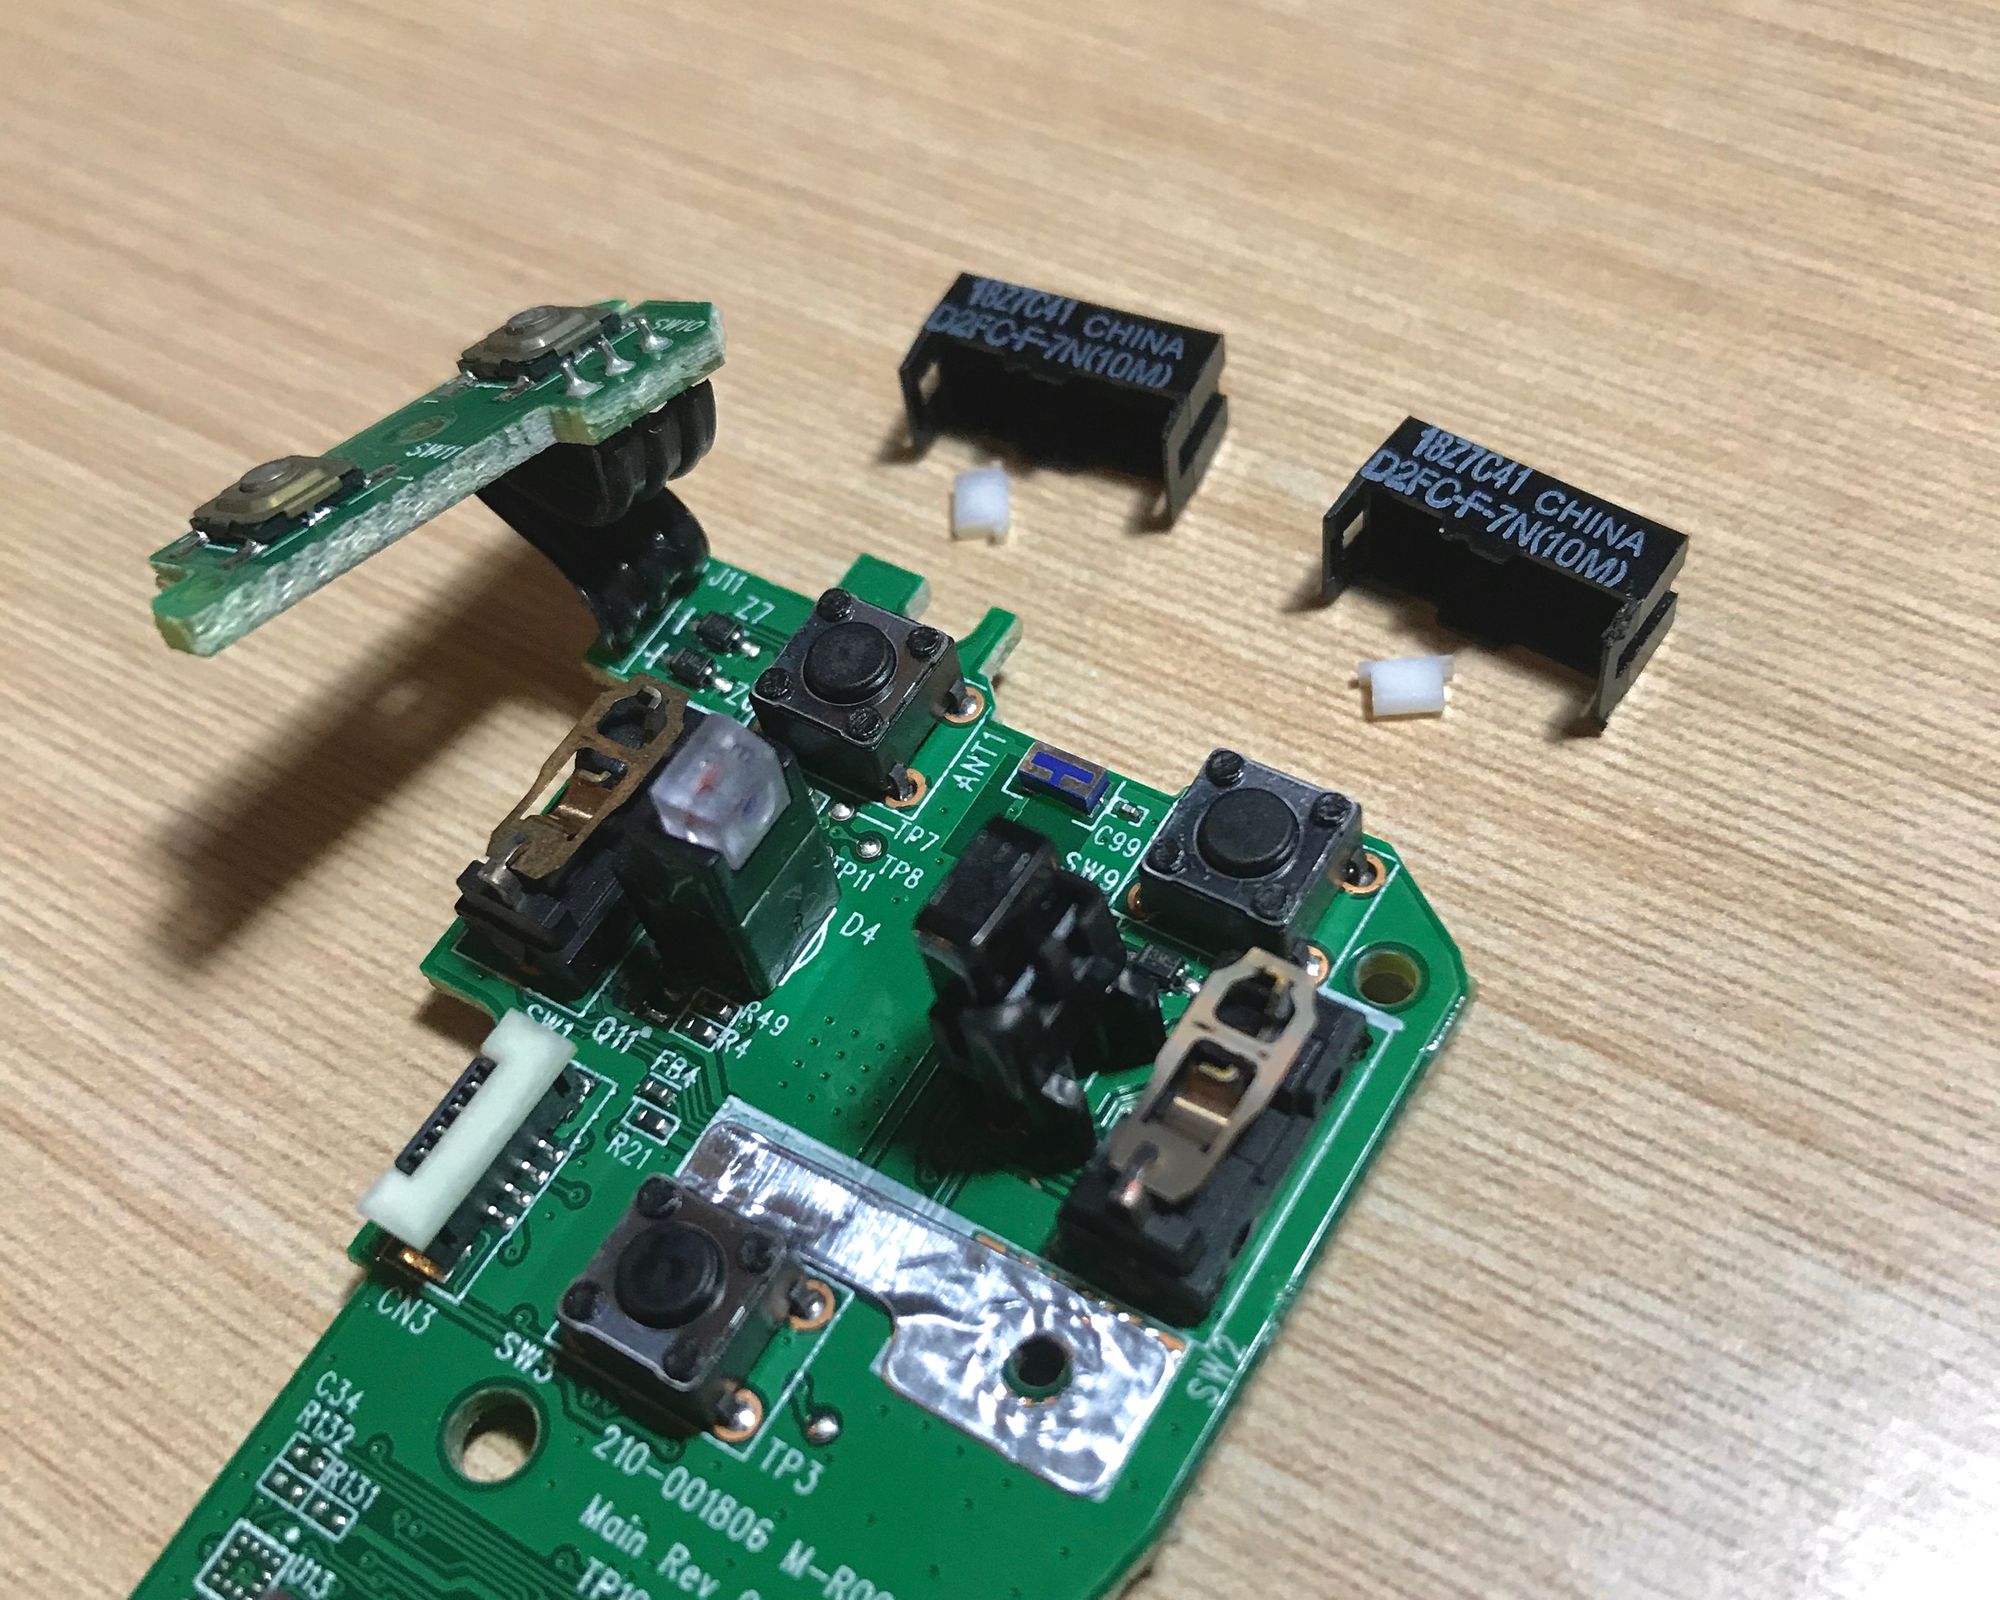
Gently unlock and remove the battery, ball socket, and switch component cables from their socket. Unscrew and remove first the battery module, then the board of the back/forward switches on the upper-left side, and lastly, the ball socket component.
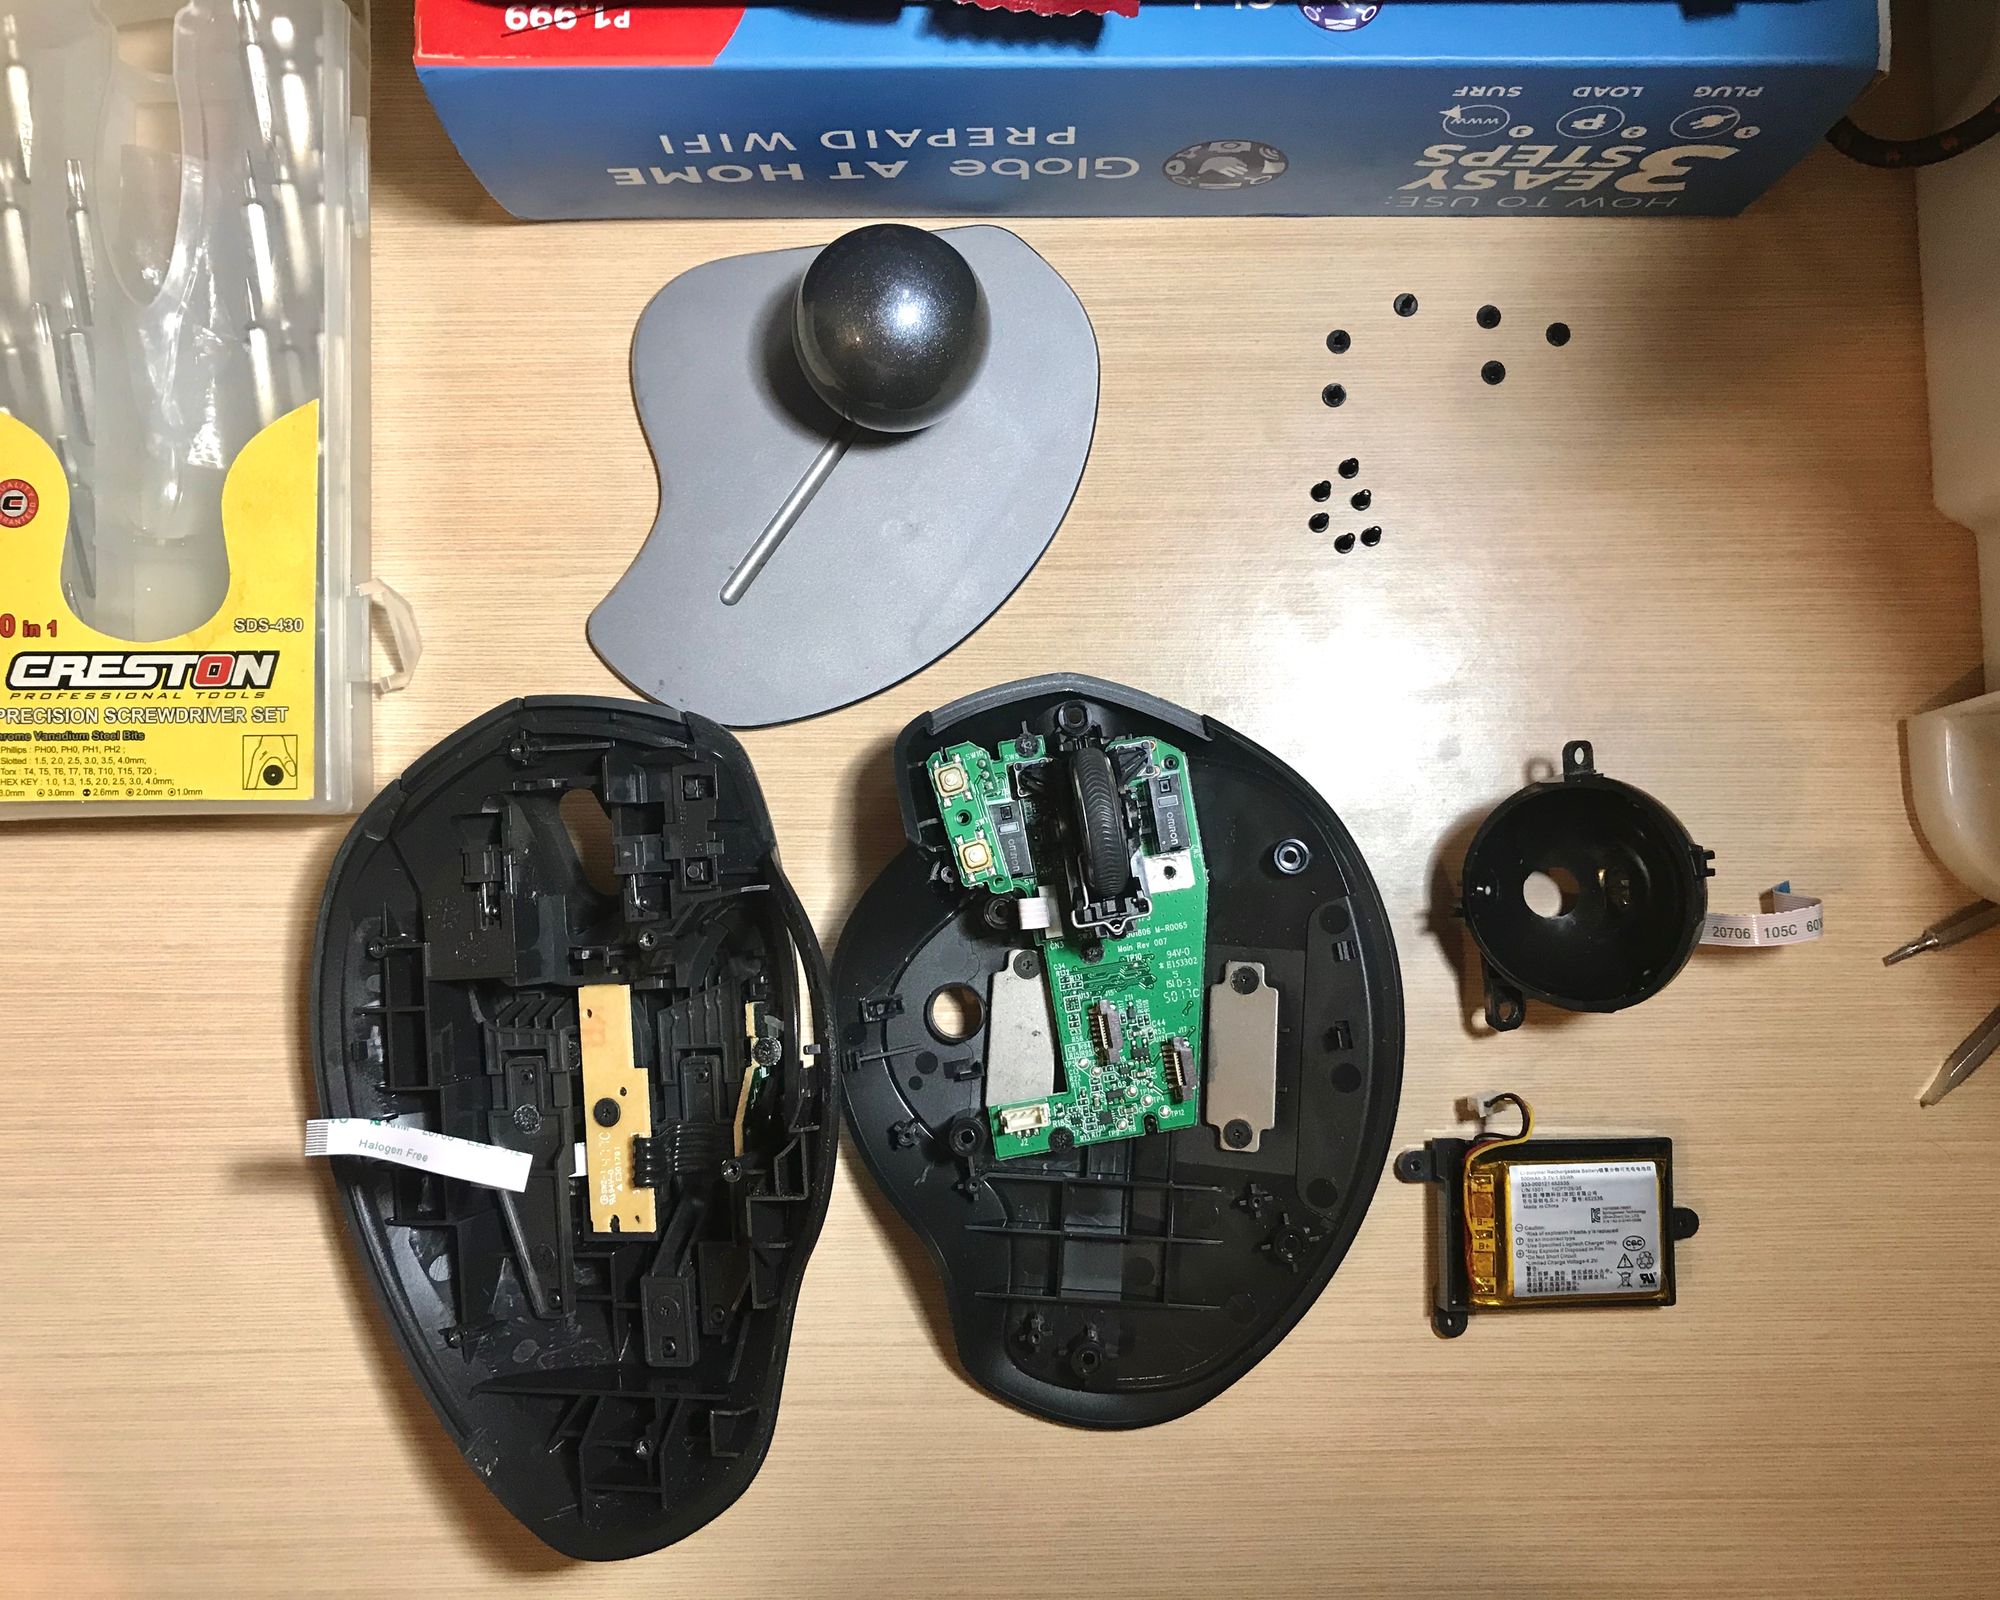
Proceed to remove the board where the mouse buttons are located. Remove first the mouse wheel from its pivot joint, then detach the flex cable of the power controller beneath from the main board. Unscrew the main board from the body to remove it.
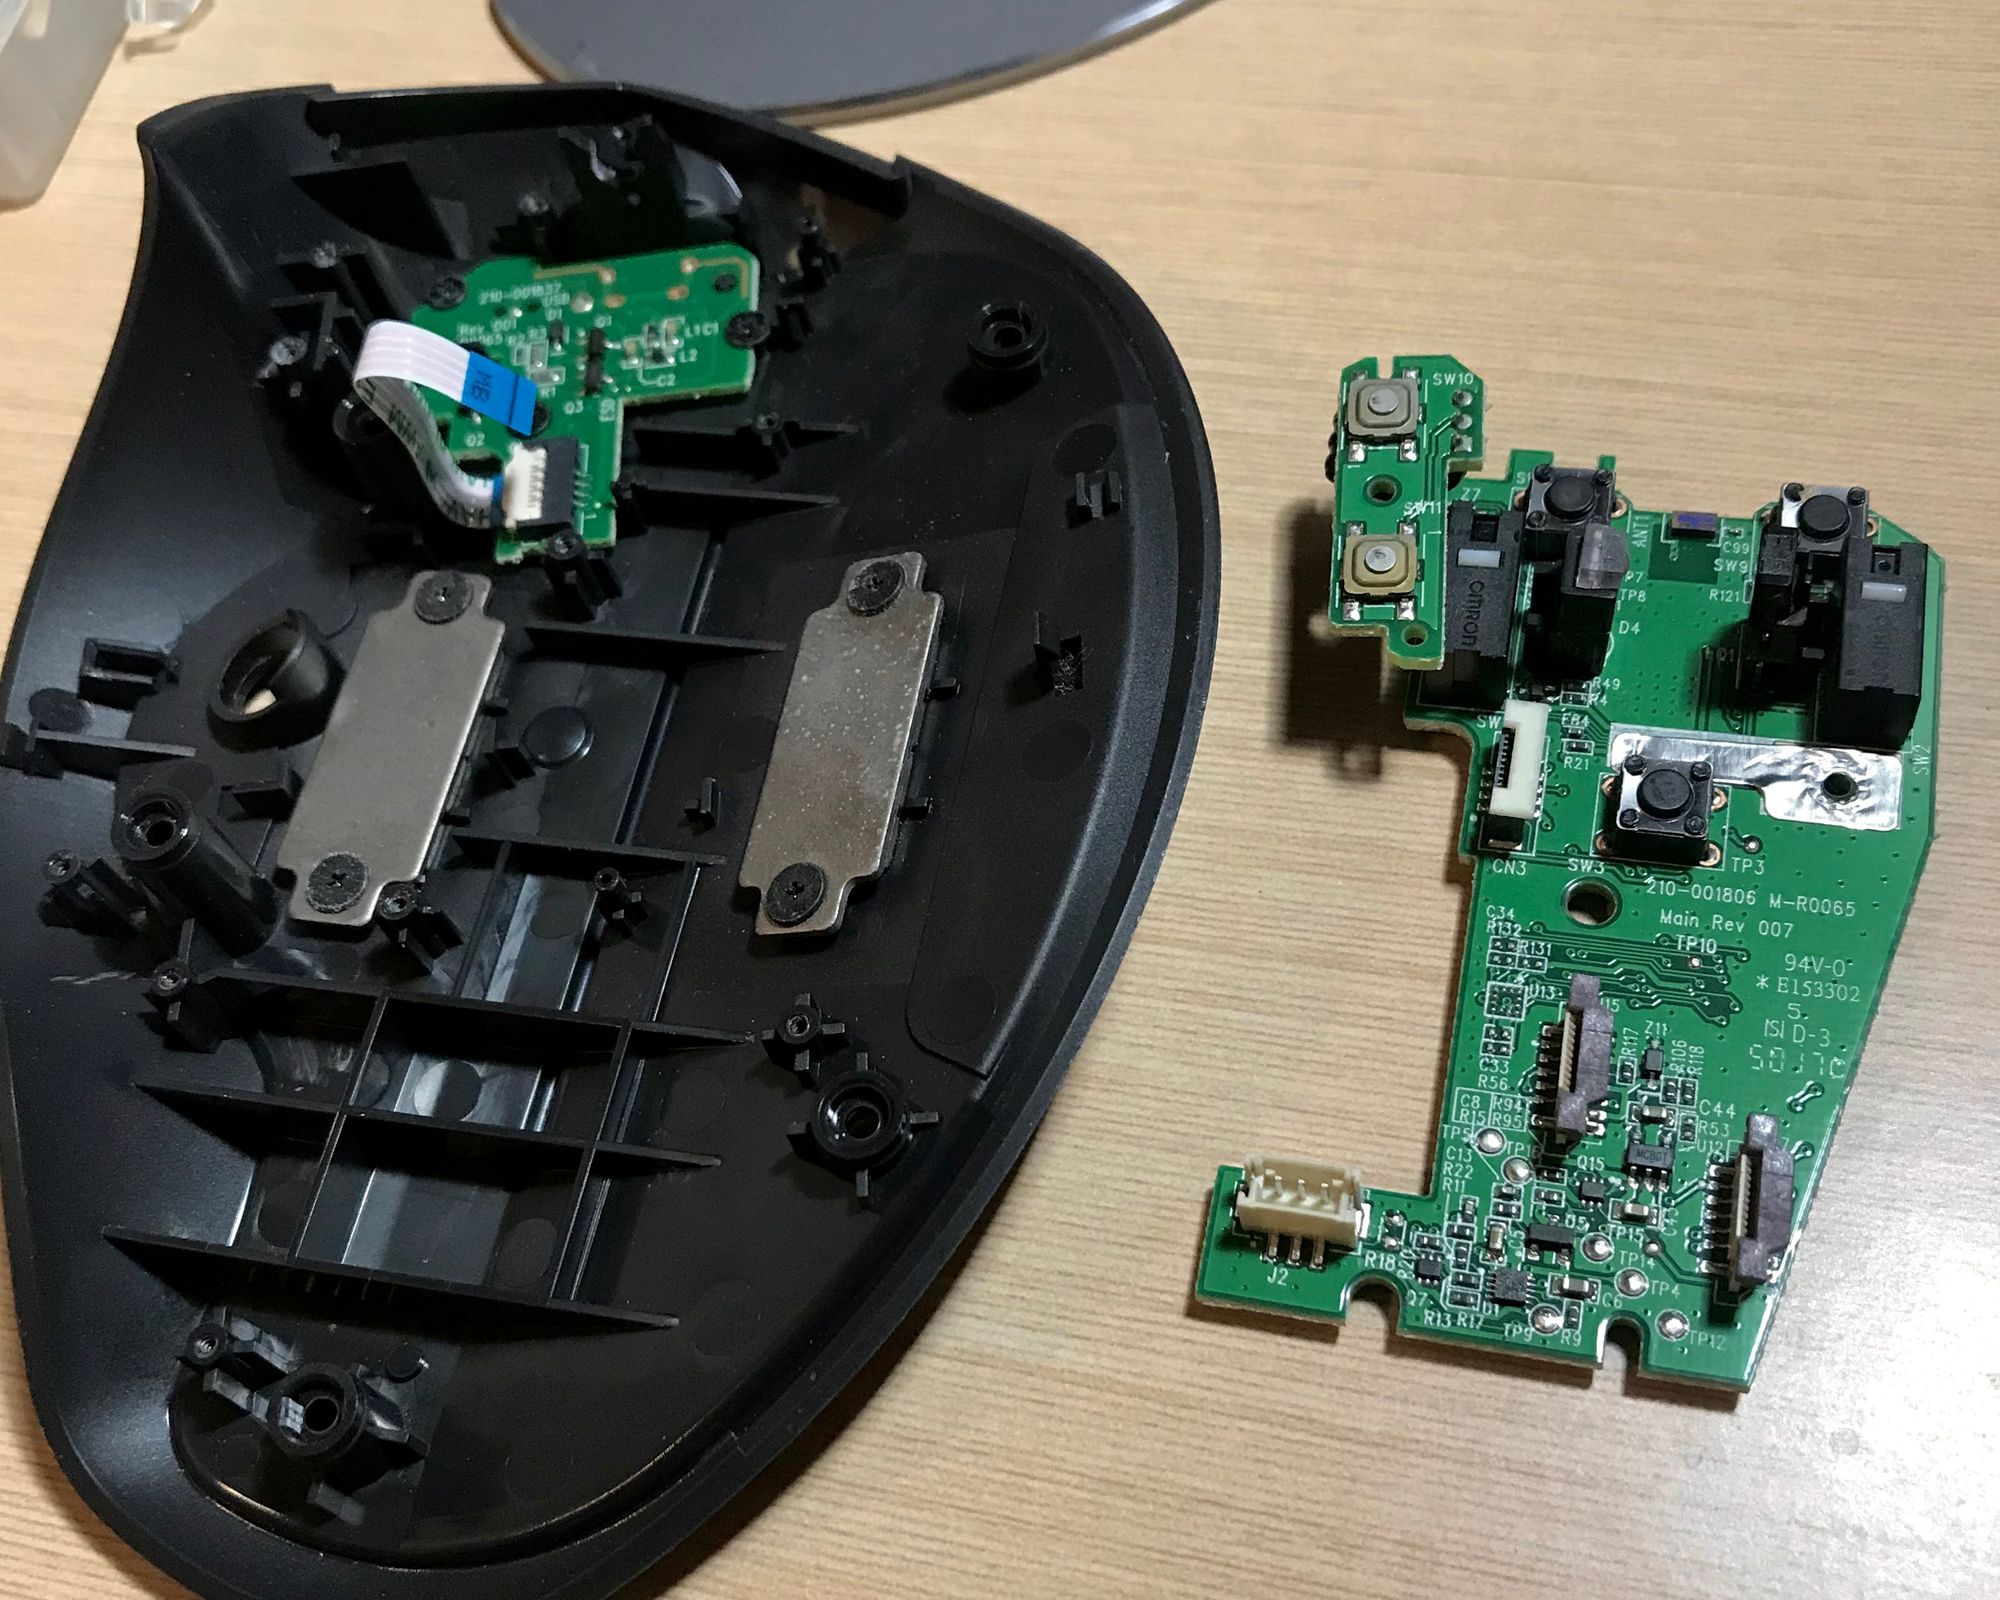
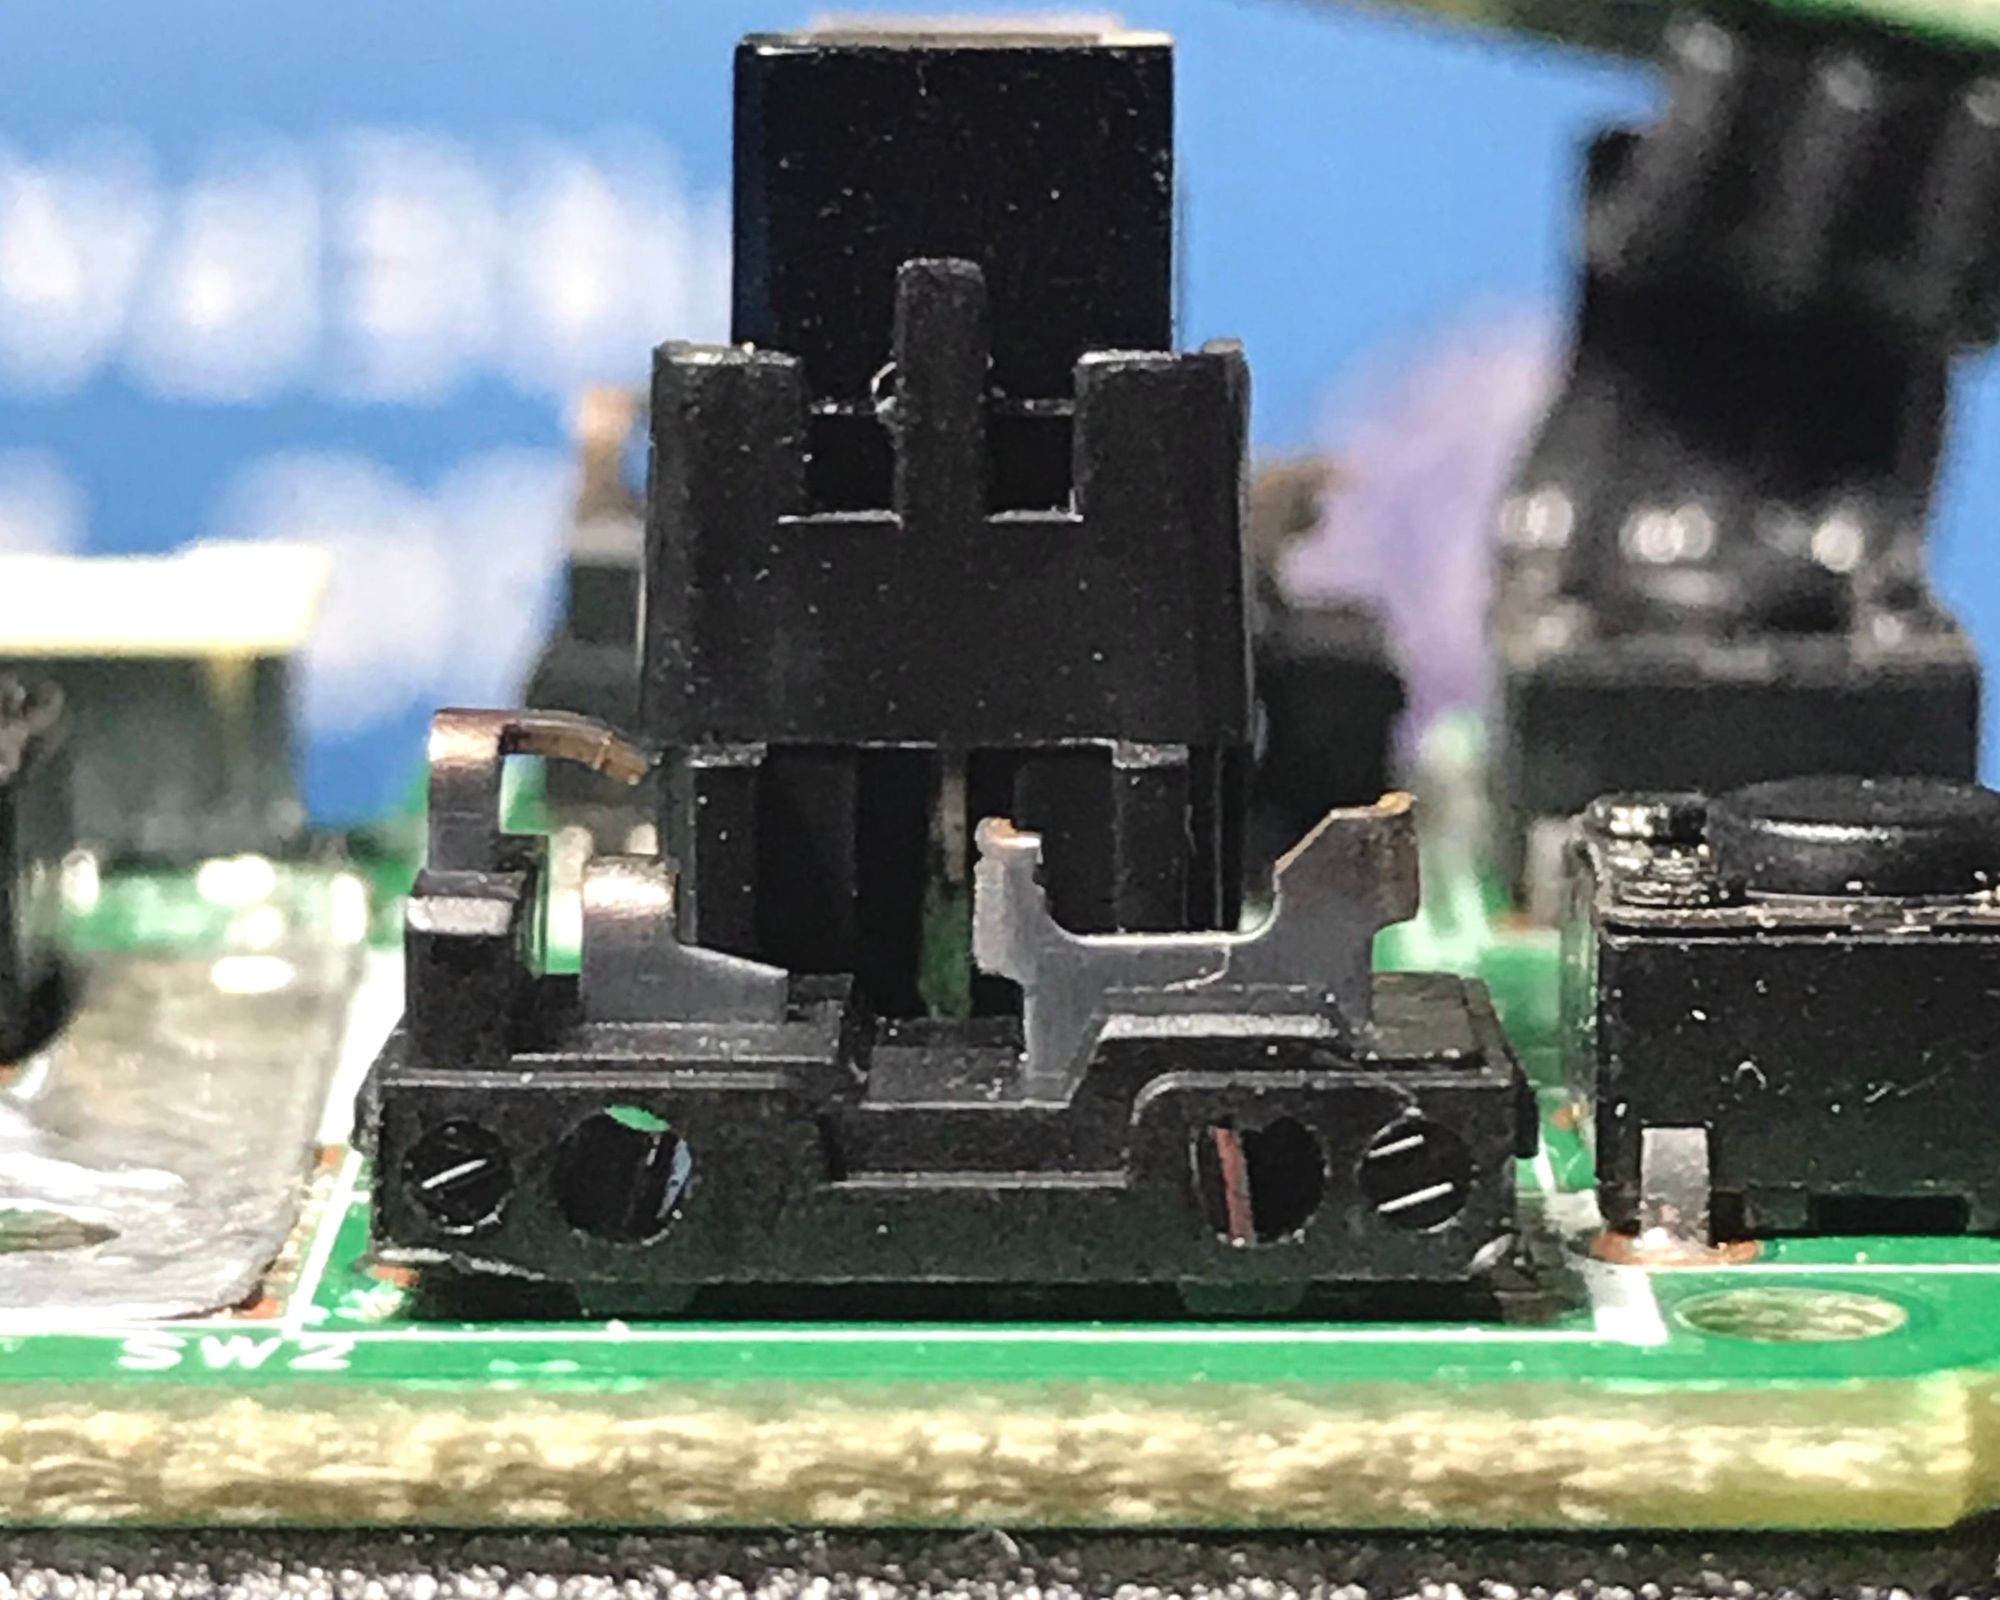
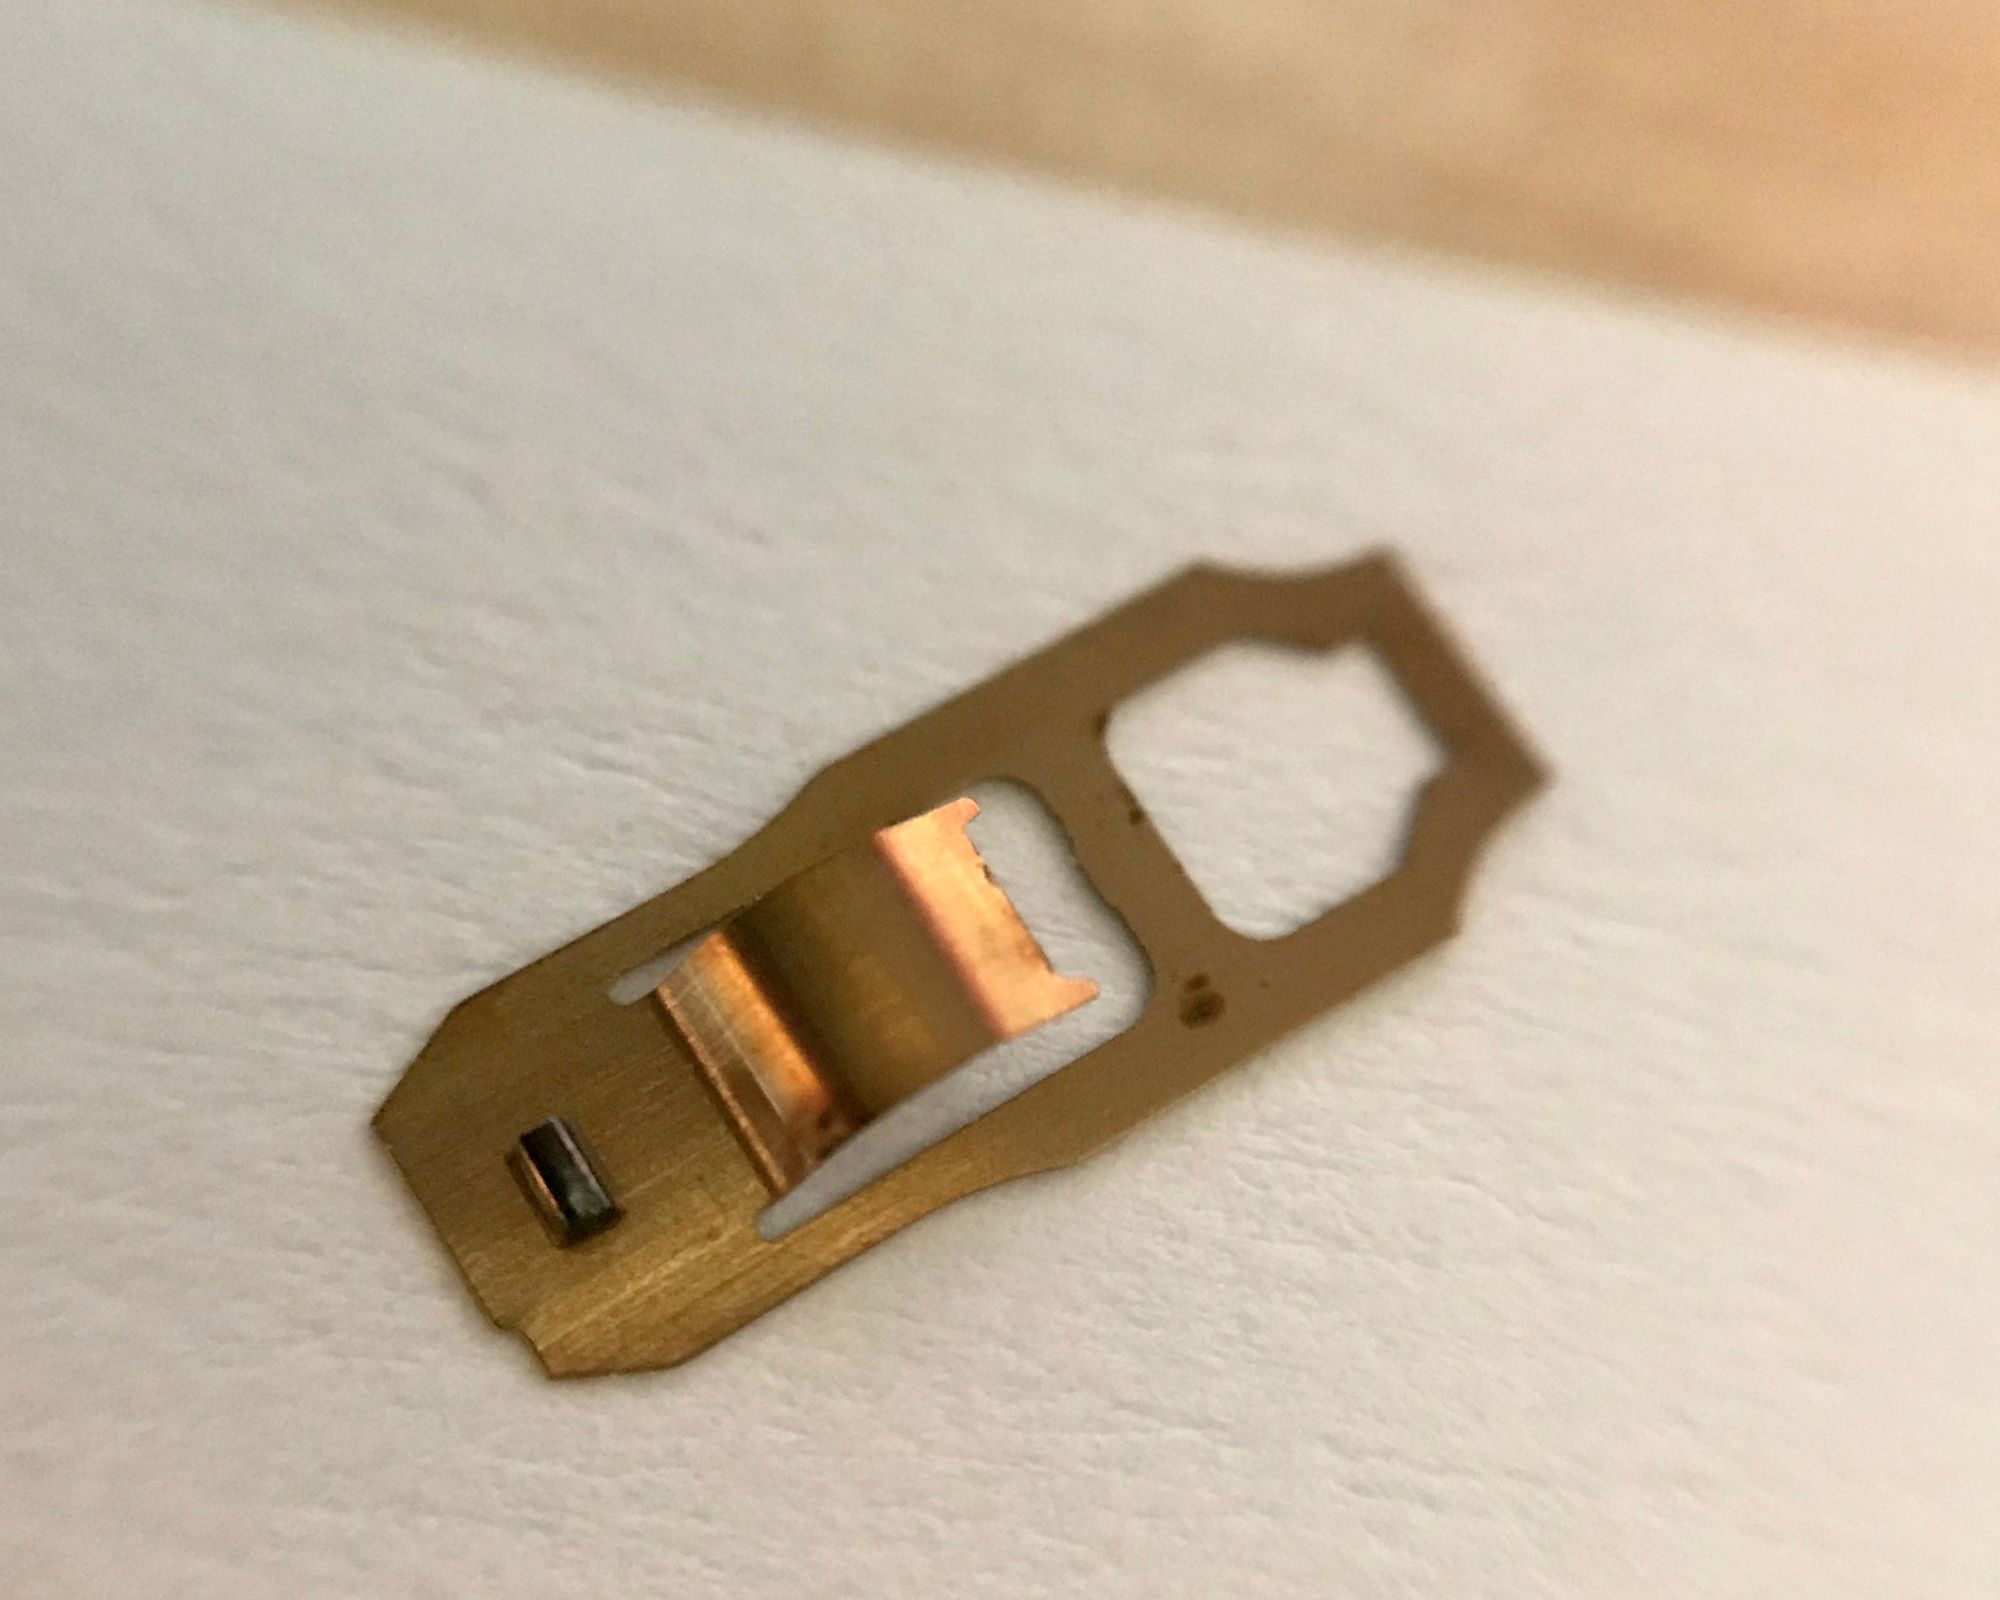
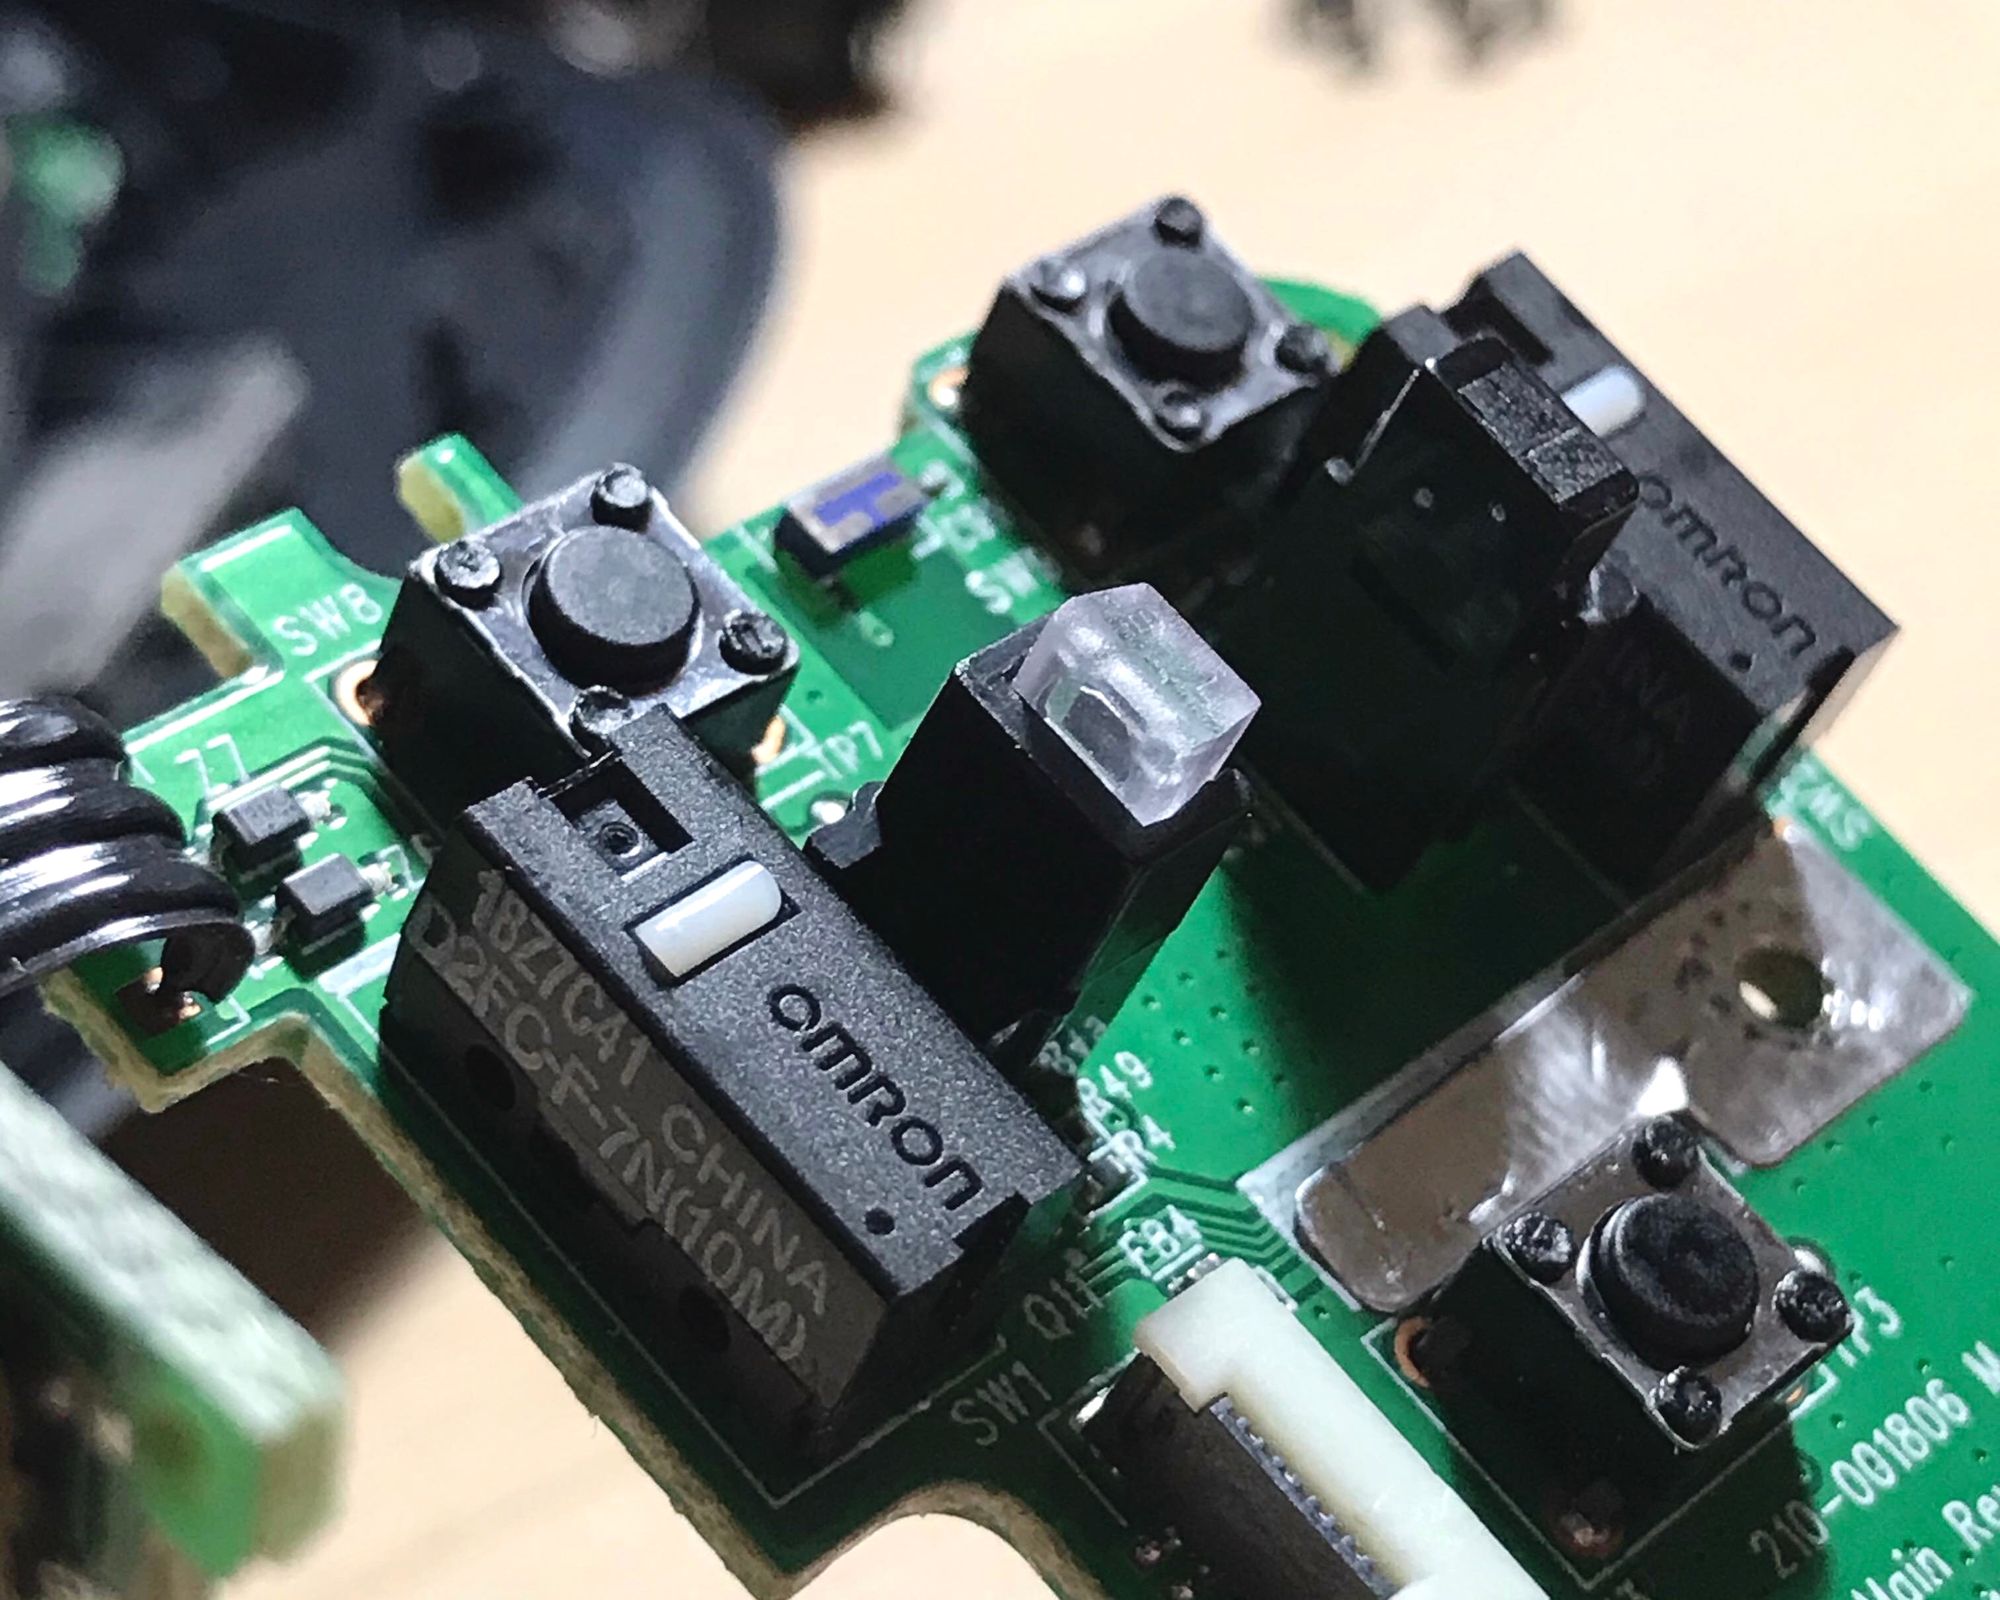
The two black Omron switches on the upper left and upper right side of the board are the click mechanism of the mouse. We need to open them from the sides carefully using a small flat-head screwdriver.
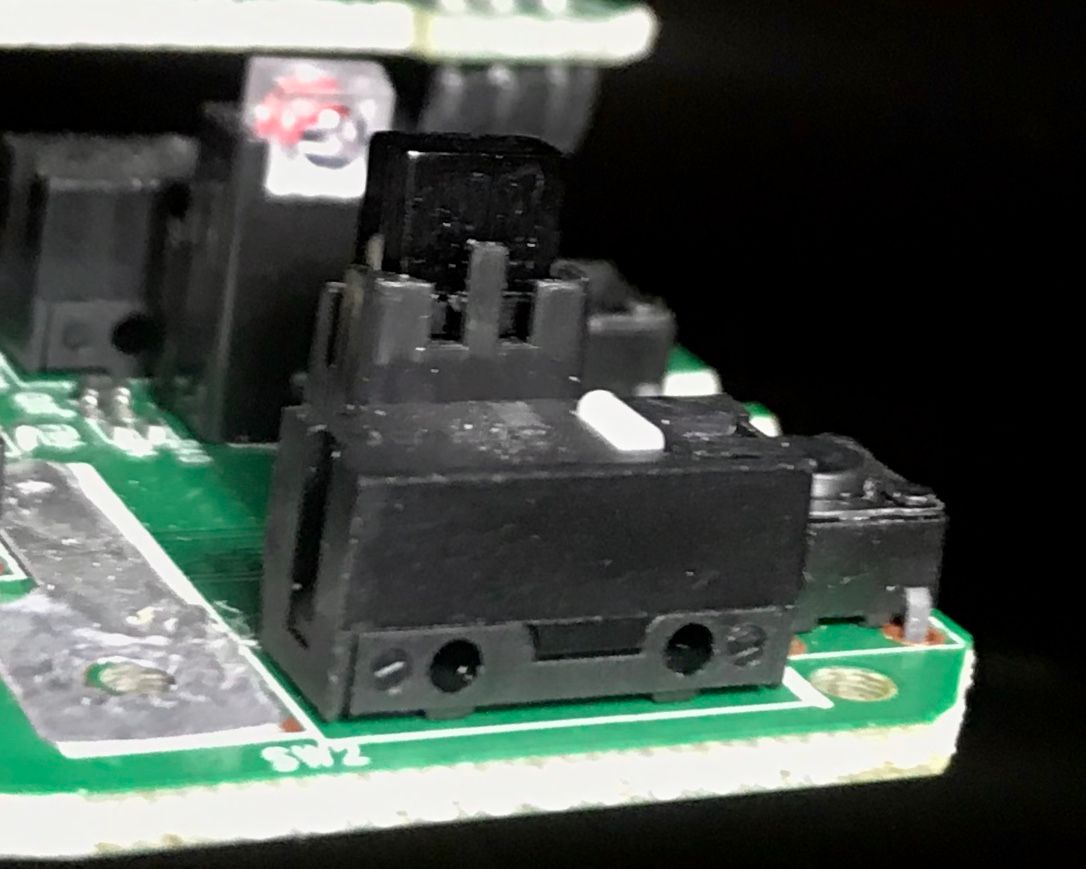
When you remove the upper cover, be careful not to drop the small white plastic bits that toggles the click. Remove the copper springs from the switch.
Over time, the copper spring loses tension due to repeated clicks. We need to bend the tab up to restore that tension.
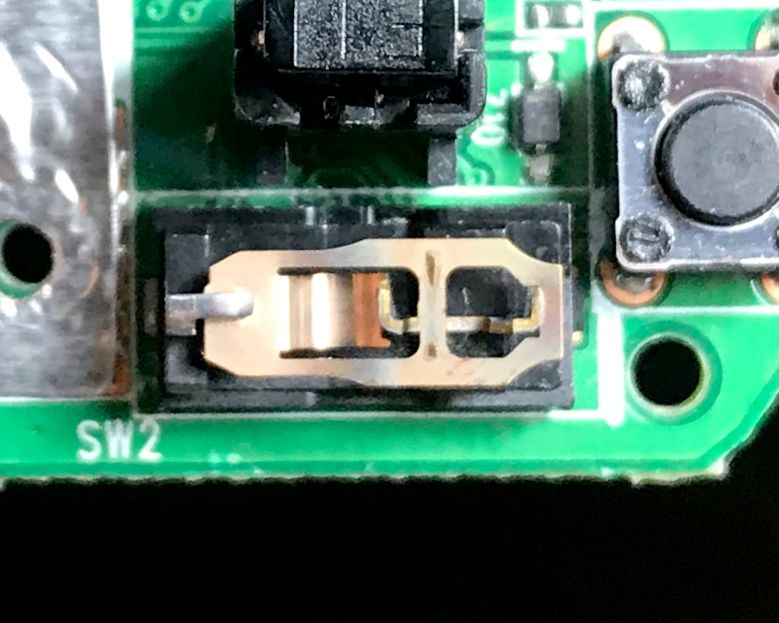
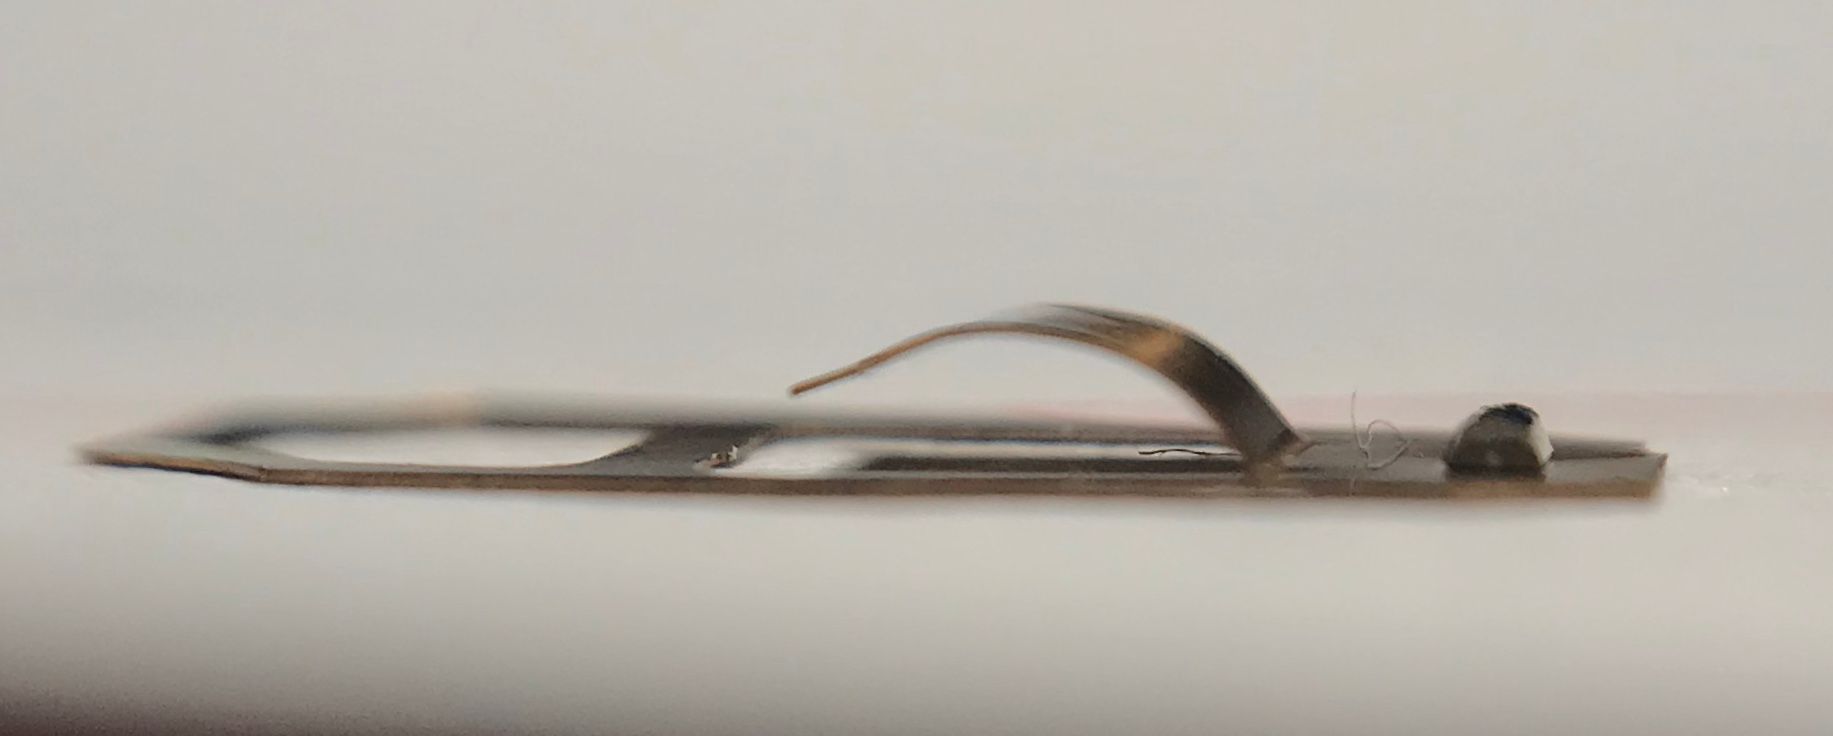

The re-installation of the copper spring is the most tedious and time-consuming part of the repair. First, attach the spring to the hook at the front of the mechanism. Then, use the flat head screwdriver to push the curved tab into place while keeping the rear of the spring under the small arm at the back of the mechanism.
Test the spring by pushing the middle part with your finger. Make sure you hear a crispier click sound and that it springs back harder than before. If not, you may need to re-tension the spring again.
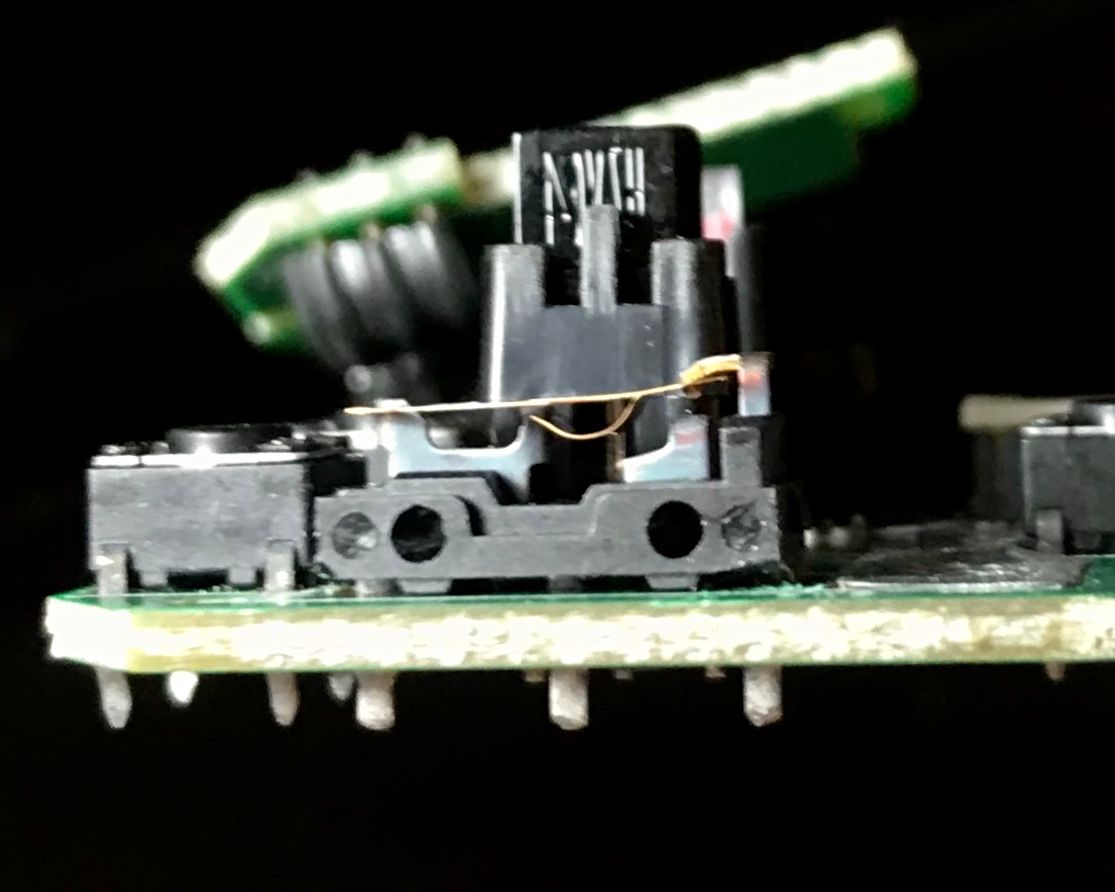
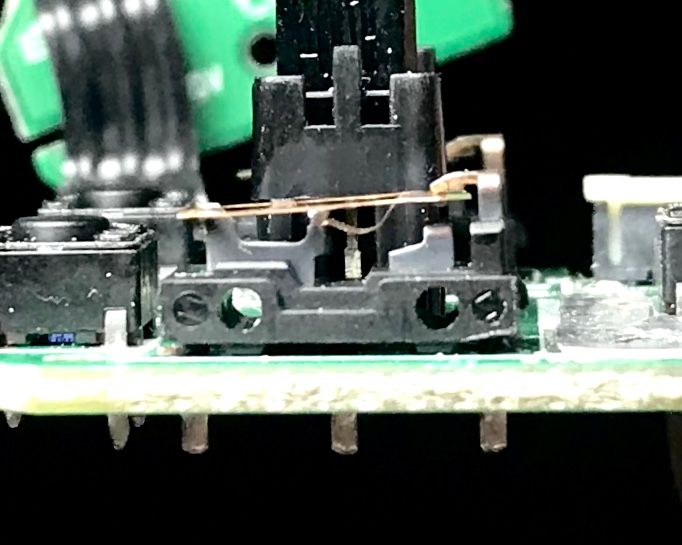
Once everything is okay, put back the switch covers. Use a tiny flat-head screwdriver to position the small white plastic trigger in its place while holding the cover upside down. Then, snap it back to the switch.
Do a final test of the switches after putting back the covers. Finally, reassemble everything back in reverse order when you disassembled it.

I think most mice have the same mechanism and are repairable with similar steps above. Overall, I think the repair is easy to do.
Update 2021-03-01
After almost six months from the last adjustment of the mouse clicker, it gave up again. The metal also looks corroded, so I think it won't last long even if I adjust it again.
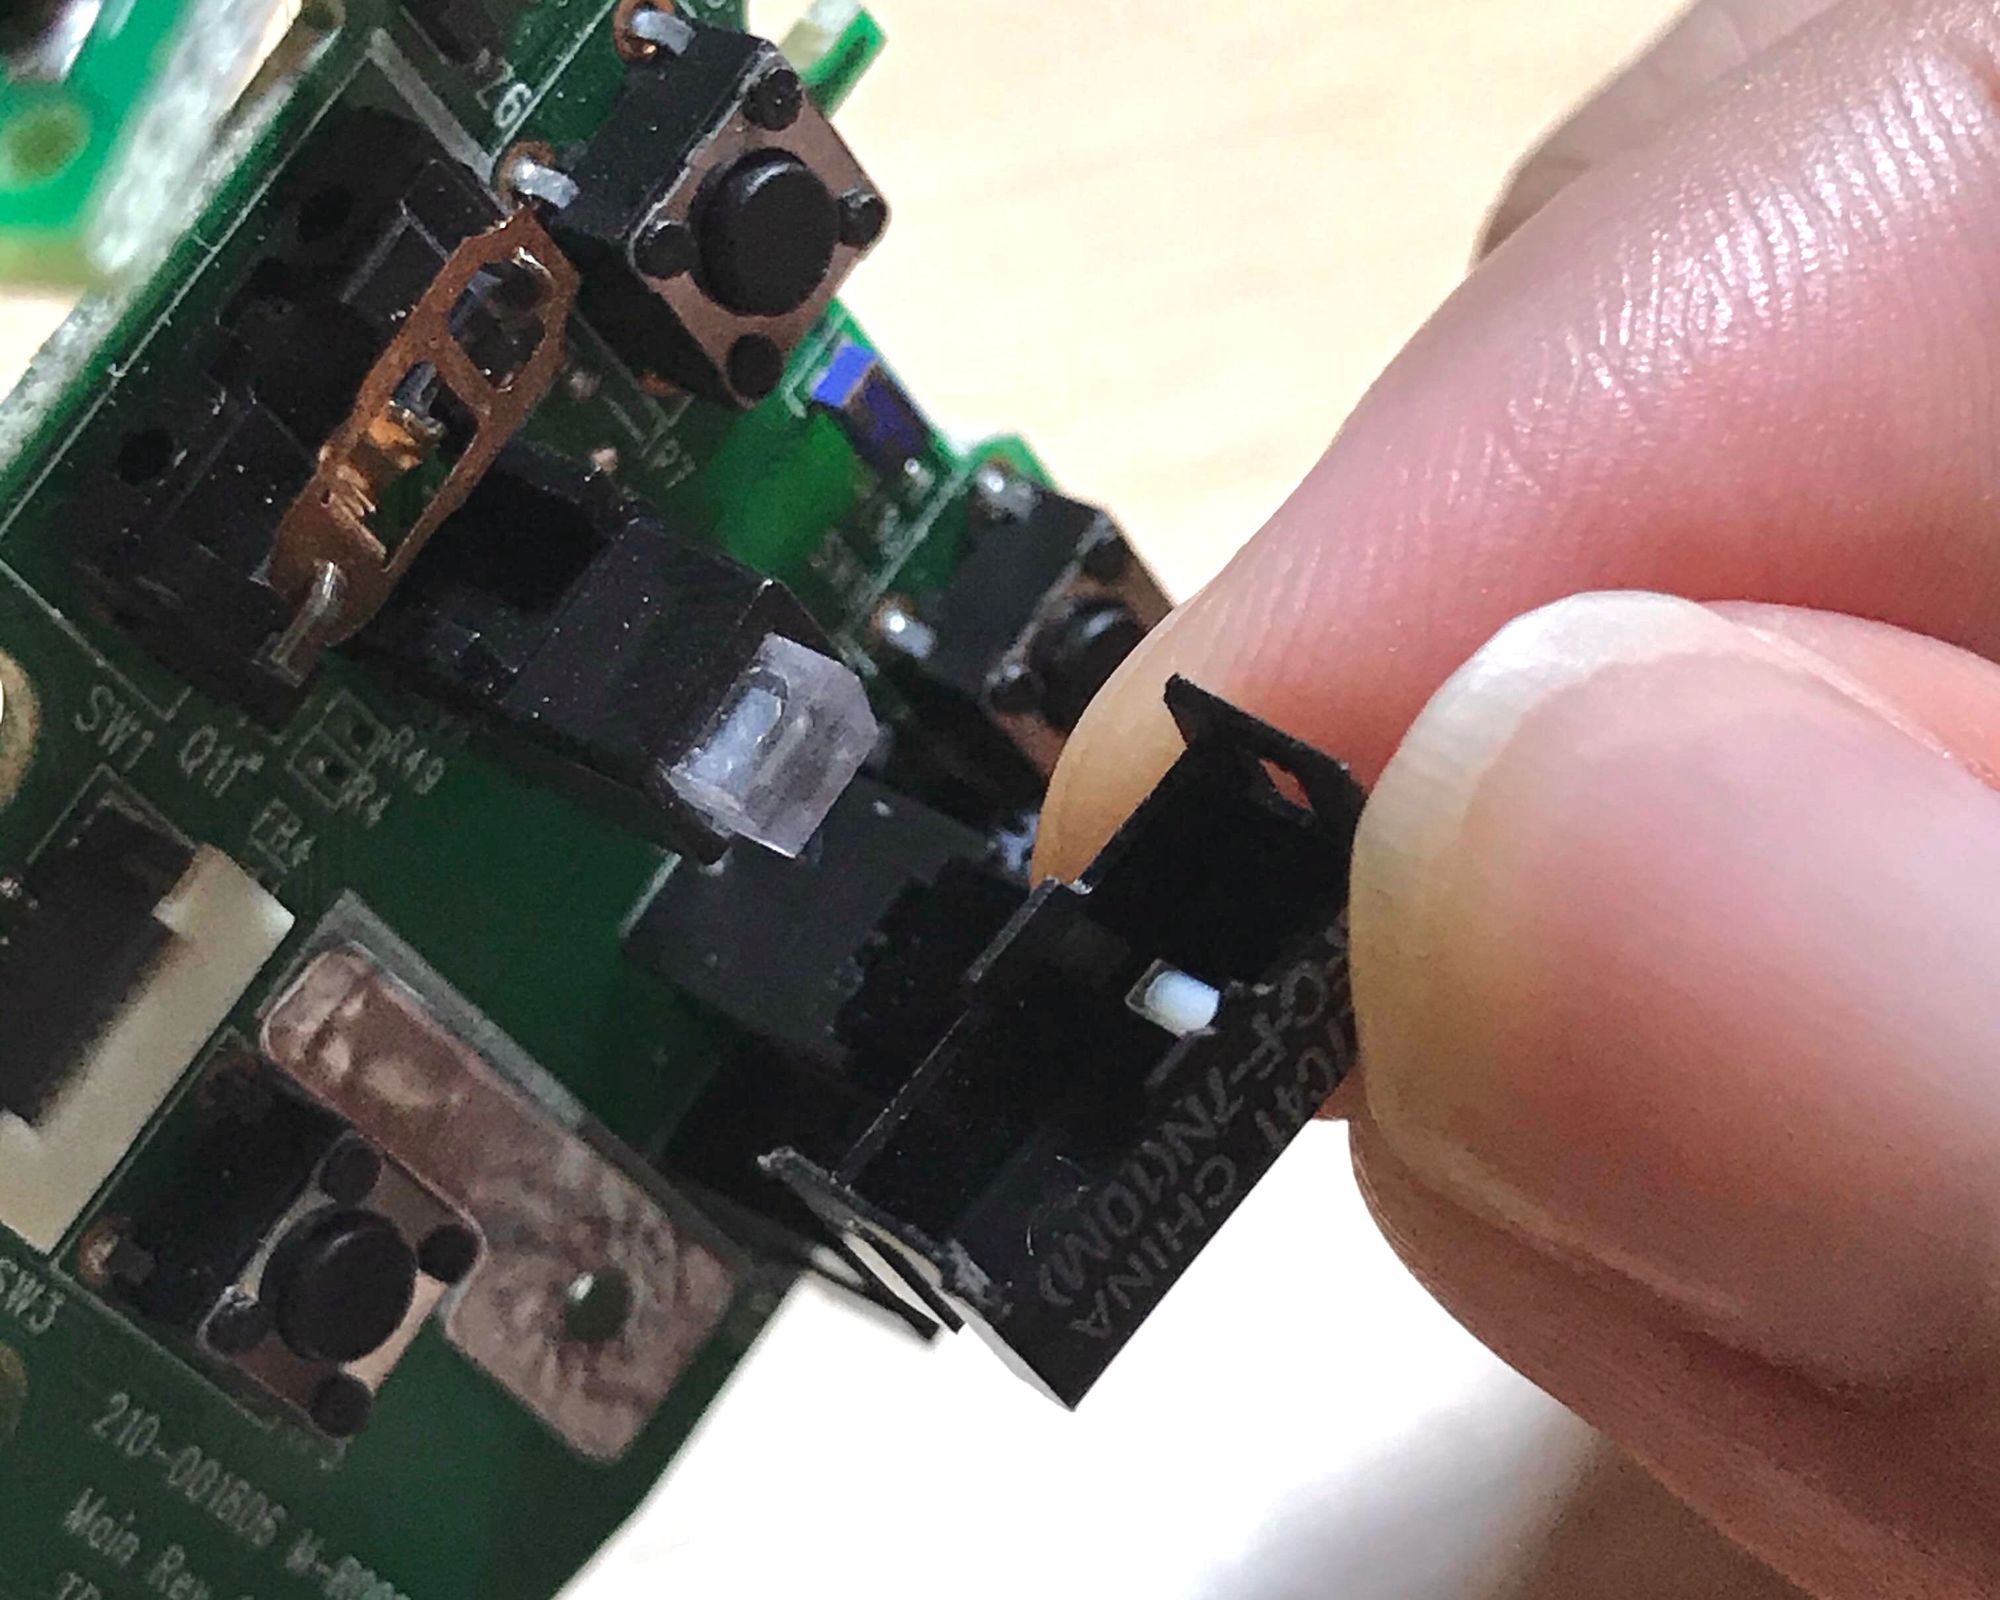
Since the metal spring is the only problem, we can get one from a new clicker, which you can cheaply buy from online shops. I was able to get two spares from my manager.
Omron D2FC-F-7N(10M)
Update 2022-04-08
More than a year since I last repaired my trusty MX Ergo, I still use it every day without any issues!
If you find yourself readjusting the clicker more often, replace the clicker spring just like I did. Corrosion in the spring can also affect conductivity. To avoid this, I recommend applying a small amount of multipurpose lubricant (e.g., WD-40) after replacing the spring.
Product Review
I've been using this mouse for quite some time, so I think I can give an honest review.
| Feature | Rating |
|---|---|
| Quality of Material | ★★★☆☆ |
| Connectivity | ★★★☆☆ |
| Ergonomics | ★★★★★ |
| Battery Life | ★★★★★ |
| Durability | ★★★☆☆ |
| Portability | ★★★★★ |
Quality of material - ★★★☆☆
The surface where you place your hands is made of rubber material. This wears out due to sweat and can easily be scratched by any sharp objects. I don't think this is the right material to apply to something that is frequently used by a hand.
Connectivity - ★★★☆☆
The Logitech Unified receiver is okay, though I haven't tried connecting another Logitech device with it.
I occasionally experience lagging cursor when using the receiver, and more often, with Bluetooth on a MacBook Pro. I've read somewhere that this is due to the receiver using the 2.4GHz bandwidth, which can cause interference with Wi-Fi signals.
Ergonomics - ★★★★★
The MX Ergo is very comfortable to use. I experienced some thumb pain with my initial use, but it went away after some time. I prefer to use it over an Apple touchpad.
Battery Life - ★★★★★
The rechargeable battery can last about a month or so, and I think it is more than enough. The charging is also fast.
Durability - ★★★☆☆
The mouse buttons fail (e.g., failing to drag, double-clicking, not clicking) relatively fast, about a year of daily use. Fortunately, you can repair it.
Portability - ★★★★★
It can fit in a small space on my desk, and I always bring it to my office every day. Quite heavy because of the metal hinge, but it is fine with me.
Conclusion
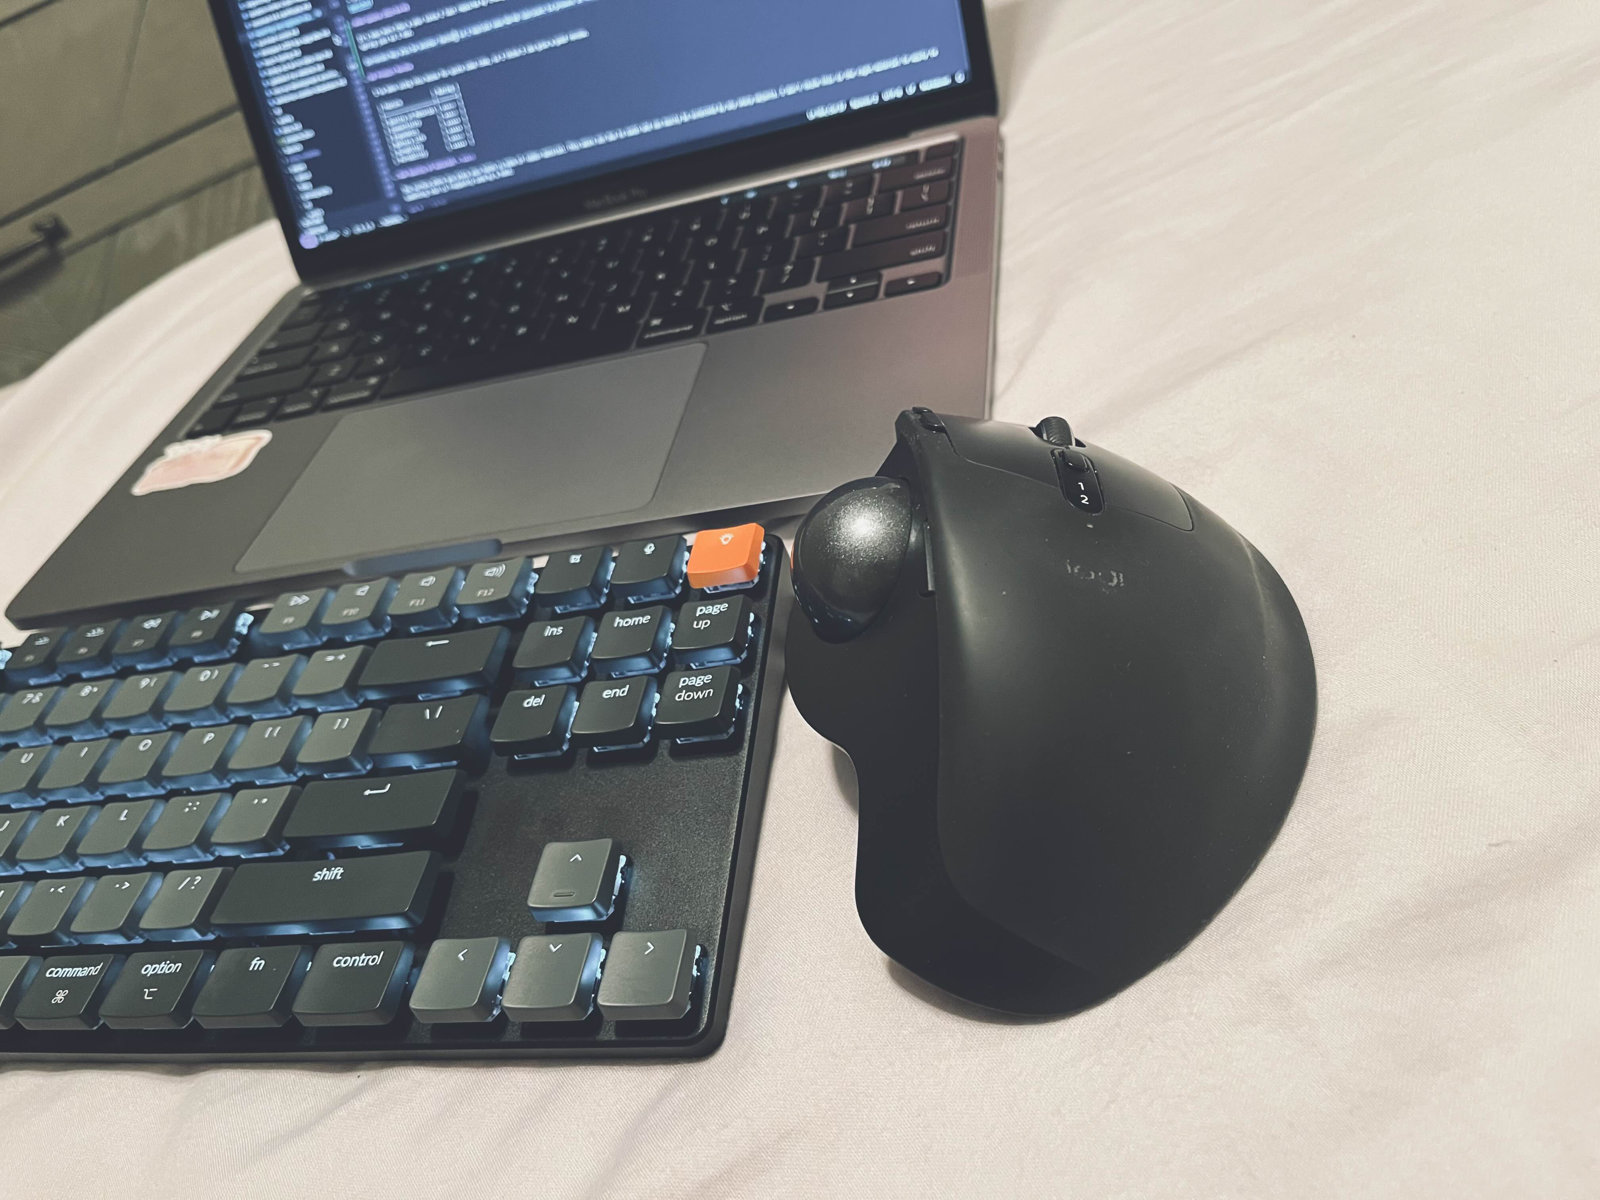
I am using my Logitech MX Ergo as my primary external pointing device for almost four years now, and I can say that this is the best mouse I've ever had so far. A bit expensive, but it's worth it. I use it all the time, and I love the precision, comfort, and speed it provides, compared to using a TrackPoint or touchpad.